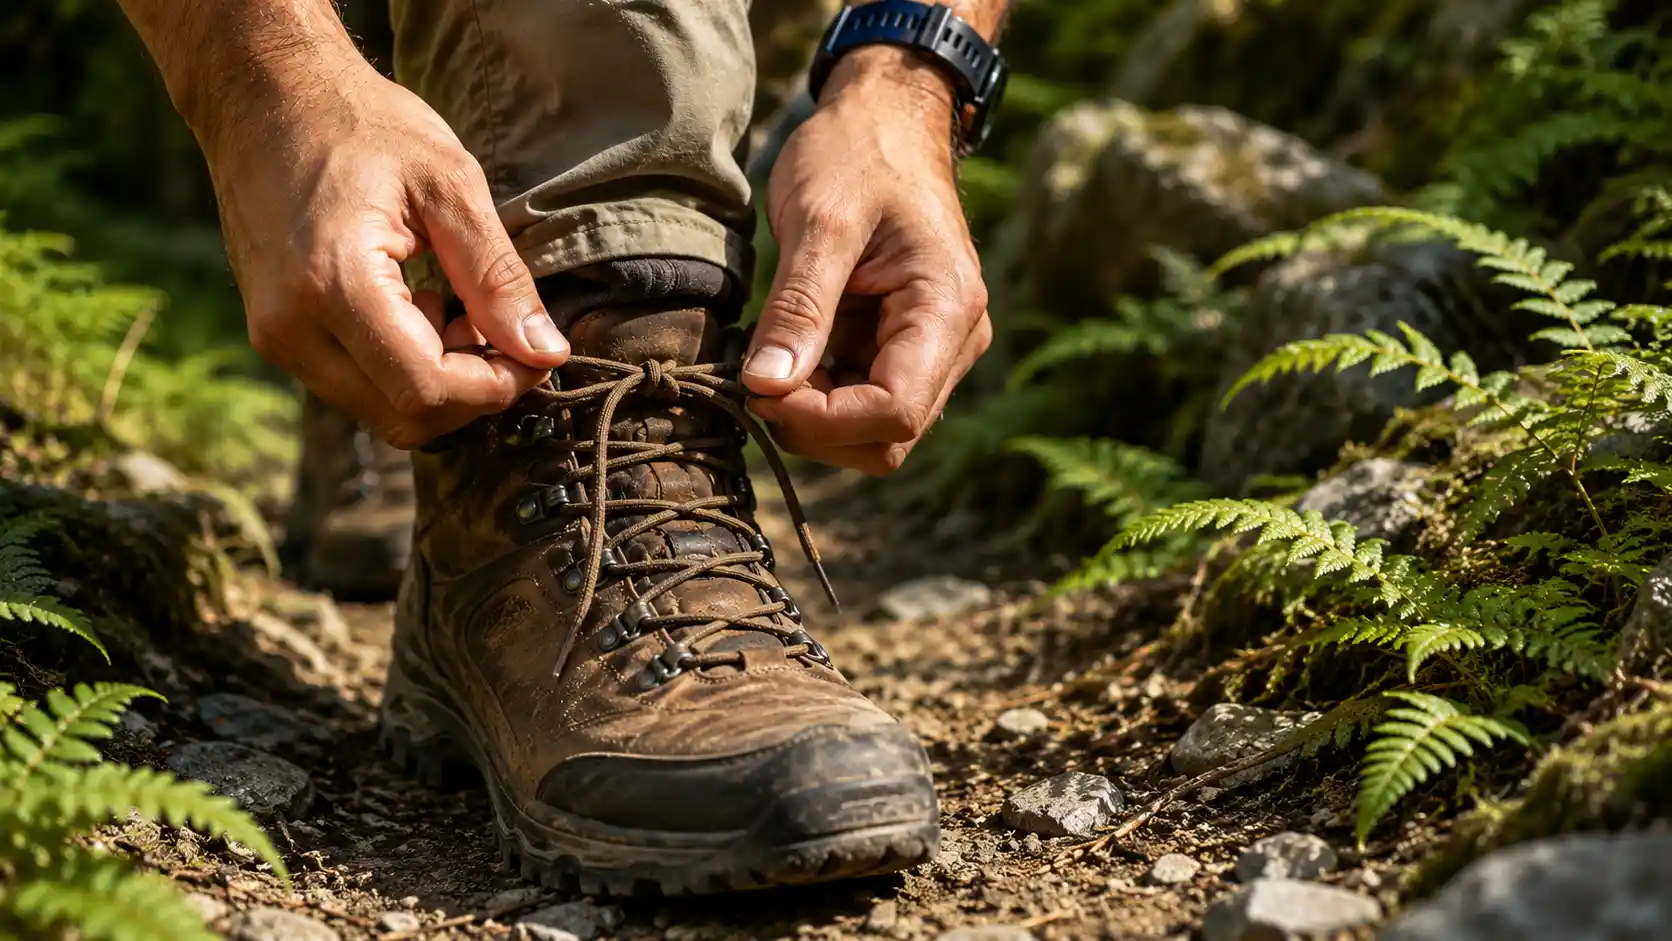
Hey there, I’m Oscar! If you have ever been miles deep into a trail only to feel that familiar, burning sting on your heel, you know how quickly a blister can ruin a hike. It is one of the most common complaints I hear from fellow hikers.
Here’s the thing. Many people blame their hiking boots or shoes when they get blisters. While a poor fit can definitely cause problems, the real culprit is often how the boots are laced. If your foot slides around inside your boot, friction happens. Add some trail sweat to that friction, and you have the perfect recipe for a painful blister.
The good news is that you do not need to buy new boots right away. Let me explain how a few simple lacing tricks can lock your foot in place, relieve pressure points, and save your feet. Let’s get your hiking gear working for you, not against you.

Quick Answer
The best way to tie hiking boots to prevent blisters is to use a targeted lacing technique that stops your foot from sliding. For heel blisters, use the “Heel Lock” (or runner’s loop) to pull your heel firmly into the back of the boot. For top-of-foot pain, use a “Surgeon’s Knot” to hold lace tension securely in specific areas. Always pair your lacing methods with moisture-wicking merino wool socks to reduce the friction and moisture that cause blisters.
What Causes Blisters When Hiking?
Before we fix the problem, we need to understand what causes it. Blisters do not just appear out of nowhere. They are the body’s response to three specific things happening at once inside your hiking shoes.
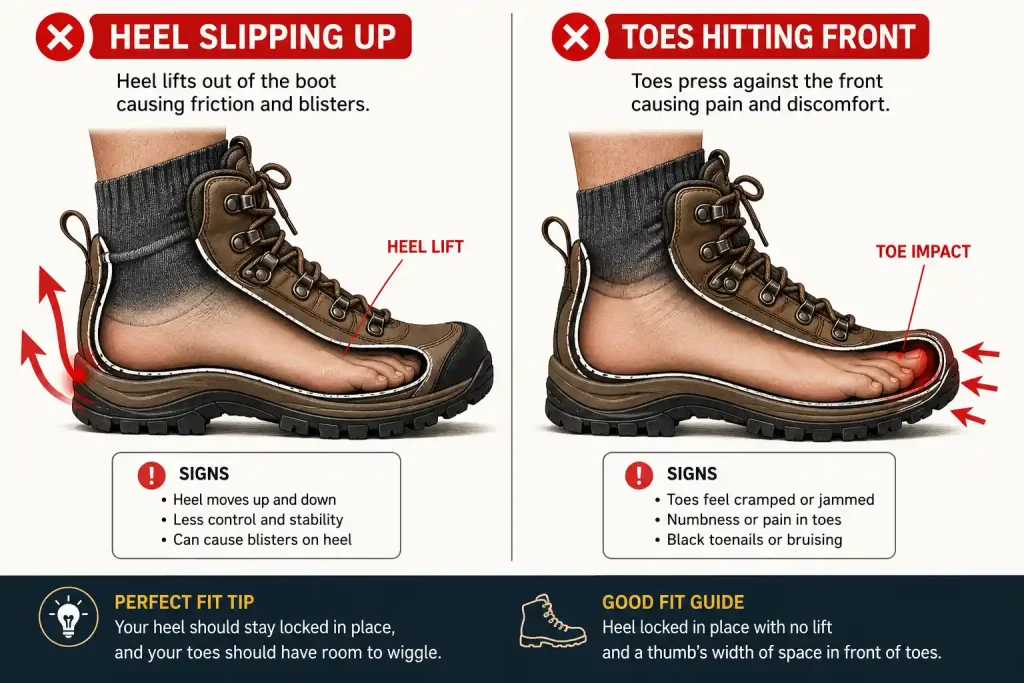
- Friction: This is the main enemy. When your heel slips up and down, or your toes slide forward and hit the front of the boot, the repeated rubbing damages your skin.
- Moisture: Feet sweat when you hike. Wet skin is much softer and weaker than dry skin, making it tear and blister much faster.
- Heat: The friction generates heat. The longer you hike, the hotter your feet get, accelerating the blister process.
By changing how you tie your hiking boots, you can completely eliminate the friction part of the equation.
How to Tell If Your Boots Are Tied Wrong
How do you know if your lacing is the problem? Your feet will usually give you warning signs long before a full blister forms. If you ignore these hot spots, you will be in for a rough backpacking trip.
Here are a few signs that you need to stop on the trail and re-tie your boots.
| What You Feel | What It Means | The Lacing Solution |
|---|---|---|
| Heel slips up and down on inclines | Collar is too loose around the ankle | Heel Lock technique |
| Toes jam into the front on downhills | Midfoot is not secured properly | Surgeon’s Knot at the ankle |
| Pinching or pain on top of the foot | Laces are too tight across the bridge | Window Lacing technique |
| Numb toes or cold feet | Laces are cutting off circulation | Loosen lower laces, secure top |
How to Tie Hiking Boots to Prevent Blisters Step by Step
Let’s dive into the practical part. You do not need any special hiking accessories for this, just your boots and the laces that came with them. Here are the three best methods to keep your feet blister-free.
1. The Heel Lock (Best for Heel Blisters)
If your heel lifts when you walk uphill, this is the knot you need. It pulls your ankle back into the heel cup of the boot.
- Lace your boots normally up to the hooks just before the top.
- Instead of crossing the laces over, run each lace straight up to the top hook on the same side. This creates a vertical “loop” on each side.
- Take the end of the right lace, cross it over, and thread it underneath the left loop.
- Take the left lace, cross it over, and thread it underneath the right loop.
- Pull both laces straight out and down. You will feel the boot tighten securely around your ankle.
- Tie a standard bow knot to finish.
2. The Surgeon’s Knot (Best for Heel Slippage on Downhills)
This knot stops your foot from sliding forward and crushing your toes when hiking downhill. It holds the tension tightly so the laces do not loosen over time.
- Lace your boot normally to the top of your instep (right where the ankle bends).
- Cross the laces as if you are going to tie a normal knot.
- Instead of twisting them around each other once, twist them twice or even three times.
- Pull the laces tight. The extra twists create friction that stops the laces from slipping.
- Run the laces up to the next set of hooks and repeat the Surgeon’s Knot.
- Finish with a standard bow at the top.
3. Window Lacing (Best for Top-of-Foot Pain)
If you have high arches or feel pressure on the top of your foot, Window Lacing relieves the pressure while keeping the rest of the boot tight.
- Unlace your boot down to the spot where you feel pain or pressure.
- Instead of crossing the laces over the painful area, run each lace straight up to the next eyelet on the same side.
- This creates an open “window” or gap over the sensitive part of your foot.
- Once you are past the pressure point, cross the laces normally and continue to the top.
- Finish with a Surgeon’s Knot at the top to lock it all in.
| Lacing Method | Primary Benefit | Difficulty Level |
|---|---|---|
| Heel Lock | Stops heel lift and friction | Easy |
| Surgeon’s Knot | Prevents forward sliding | Medium |
| Window Lacing | Relieves pressure points | Easy |
Common Mistakes to Avoid
Even with the best lacing techniques, a few bad habits can still wreck your feet. Make sure you avoid these common mistakes on the trail.
- Tying boots too tight: This cuts off circulation and makes your feet swell faster. Your boots should feel snug, like a firm handshake, but never painful.
- Using worn-out laces: Old, thin laces stretch out as you walk. If your laces keep coming untied or losing tension, replace them.
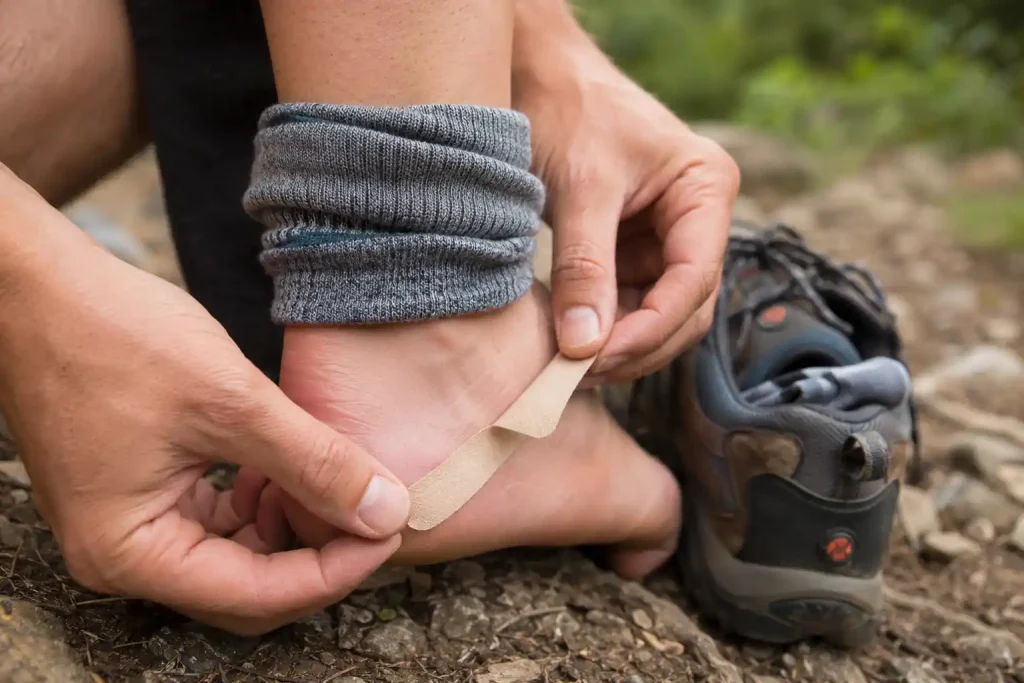
- Ignoring hot spots: If you feel a rubbing sensation, stop immediately. Do not wait until you reach the summit. Re-tie your boots or apply blister tape right then and there.
- Wearing cotton socks: Cotton traps sweat against your skin. Always choose merino wool or synthetic hiking socks to keep your feet dry.
Expert Tips from Oscar
After years of trail hiking and testing different hiking backpacks and gear, I’ve picked up a few extra tricks for keeping my feet happy.
Oscar’s Tip on Downhill Hikes:
Before you start a long descent, stop and completely re-lace your boots. Kick your heel firmly into the back of the boot, then tie a Surgeon’s Knot at the ankle. This takes two minutes but saves your toes from getting bruised on the way down.
Oscar’s Tip on Sock Liners:
If you are still getting blisters despite good lacing, try a two-sock system. Wear a thin, silk or synthetic liner sock under your thicker hiking sock. The friction will happen between the two socks, instead of between the sock and your skin.
Oscar’s Tip on Trail Maintenance:
Your feet will swell as the day goes on. A lacing job that felt perfect at 8:00 AM might feel way too tight by 2:00 PM. Do not be afraid to adjust your laces halfway through your hike.
Key Takeaways
- Blisters are caused by a combination of friction, moisture, and heat.
- The Heel Lock technique is the best way to stop your heel from sliding and blistering.
- Use a Surgeon’s Knot to lock lace tension in place and prevent your foot from sliding forward on downhills.
- Use Window Lacing to relieve pressure on the top of your foot.
- Always act immediately if you feel a “hot spot” forming on your foot.
Frequently Asked Questions
Should hiking boots be tied tight or loose?
Hiking boots should be tied snugly, but not overly tight. They need to be secure enough to prevent your foot from sliding around, but loose enough to allow proper blood circulation. A good rule is that they should feel like a firm handshake across your midfoot.
Do thick socks prevent blisters?
Thick socks can help cushion your foot, but thickness alone does not prevent blisters. The material matters more. According to the American Hiking Society, you should wear merino wool or synthetic socks because they wick moisture away. Cotton socks, even thick ones, trap moisture and cause blisters.
How do you stop your toes from hitting the front of your hiking boots?
To stop toe bang, use the Surgeon’s Knot technique at the bend of your ankle. This locks your heel securely into the back of the boot. Also, make sure you are keeping your toenails trimmed short before any long hike.
Should I pop a blister if I get one while hiking?
Generally, you should avoid popping a blister to prevent infection. If it is large and painful, medical experts at the American Academy of Dermatology recommend sterilizing a needle, carefully piercing the edge to drain the fluid, and leaving the skin roof intact before covering it with a bandage.
Can trekking poles help prevent foot blisters?
Yes, indirectly. Trekking poles take some of the weight and impact off your feet and legs, especially on steep downhills. This reduces the force pushing your foot forward into the boot, which can reduce the friction that causes blisters.
Conclusion
Learning how to tie hiking boots to prevent blisters is one of the most valuable outdoor skills you can master. It costs absolutely nothing, takes only a few minutes to learn, and can drastically improve your comfort on the trail. Whether you are out for a quick day hike or a multi-day backpacking adventure, taking care of your feet should always be a top priority.
So what should you do next? I recommend putting your boots on right now in your living room and practicing the Heel Lock and the Surgeon’s Knot. Walk up and down your stairs to see how they feel. If you are preparing for a bigger trip, make sure to check out our essential hiking gear checklist to ensure you have all your bases covered.
Stay safe out there, and happy trails!