
I still remember my first long day hike. I had spent weeks planning the route, packing my snacks, and checking the weather. But I made one massive beginner mistake: I bought my hiking shoes in my exact everyday street shoe size. By mile six, my toes were slamming into the front of the boots on every downhill section. By the time I reached my car, I had blisters the size of quarters and a bruised toenail that eventually fell off.
Here’s the thing. Your feet behave completely differently on a hiking trail than they do walking around a grocery store or an office. They swell up, they sweat, and they slide forward when you walk downhill. If you are wondering how to choose hiking shoes size correctly, you are already asking the right question to save yourself a lot of pain.
In this guide, I will share exactly how to find the perfect fit. Whether you are picking out heavy-duty hiking boots for a weekend backpacking trip or lightweight trail runners for local nature trails, getting the right size is your most important gear decision. Let’s make sure your feet stay happy, comfortable, and blister-free on your next adventure.
Quick Answer
To choose the correct hiking shoe size, you generally need to go up a half size or even a full size from your normal everyday shoe. Your toes need plenty of wiggle room in the front because feet swell naturally during a hike and slide forward on downhill trails. When trying on shoes unlaced, you should be able to slide one index finger comfortably between your heel and the back of the shoe. Always try on new hiking shoes at the end of the day when your feet are largest, and wear the exact thick hiking socks you plan to use on the trail.
What You Should Know About Hiking Footwear Sizing
Before you even look at brand names or colors, you need to understand how hiking changes your feet. Everyday shoes just need to be comfortable while you sit, stand, or walk on flat concrete. Hiking shoes are a piece of safety gear designed to protect you on dirt, rocks, roots, and steep hills.
When you hike, blood flow increases and blood pools slightly in your lower extremities due to gravity and exertion. This causes your feet to swell. A shoe that feels perfectly snug at 9:00 AM in your living room will feel like a medieval torture device by 3:00 PM on a mountain trail.
Here are the main reasons your trail shoe size needs to be larger than your street shoe size:
- Foot Swelling: Heat, friction, and constant impact cause your feet to expand in length and width as the day goes on.
- Downhill Sliding: Gravity pulls your foot forward inside the shoe when walking downhill. If you don’t have extra room at the front, your toes will hit the hard toe bumper.
- Sock Thickness: Proper hiking socks made of merino wool or synthetic blends are usually much thicker than everyday cotton socks.
- Arch Compression: Carrying a heavy backpack puts extra weight on your feet, which can slightly flatten your arches and cause your feet to splay wider.
For more great tips on choosing proper hiking gear and preparing your feet for the trail, I always recommend checking out resources from the American Hiking Society. They offer excellent, trustworthy advice for hikers of all levels.
Signs Your Hiking Shoes Are the Wrong Size
How do you know if the shoes you currently own are the wrong size? Your feet will usually tell you, loudly and clearly. It is normal for new shoes to feel slightly stiff until they break in, but they should never cause sharp pain, numbness, or severe rubbing.
If you are experiencing pain on the trail, do not ignore it. Stop and check your feet. Sometimes, you just need to adjust your laces or change your socks. Other times, it means you have the wrong shoe entirely.
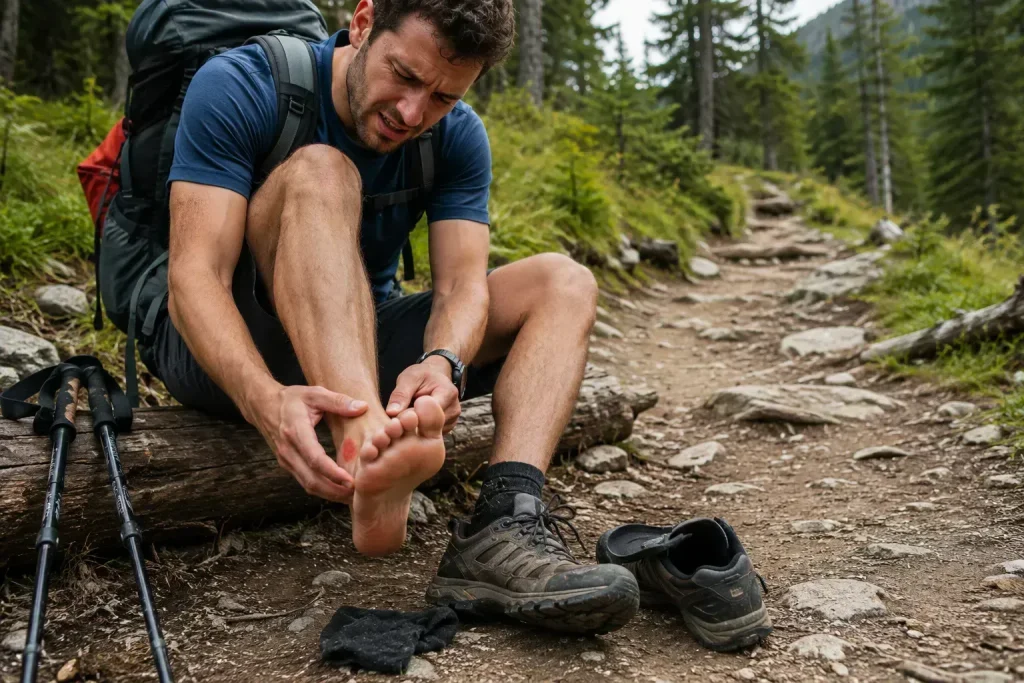
Below is a quick guide to help you read what your feet are trying to tell you.
| The Problem or Pain Point | What It Usually Means | What You Should Do |
|---|---|---|
| Bruised or black toenails after a hike. | Shoes are too short, or laces are too loose letting foot slide forward. | Size up by a half size. Use a heel-lock lacing method to secure the ankle. |
| Blisters directly on the back of your heel. | Shoe is too big, or the heel cup shape doesn’t match your foot, causing rubbing. | Try thicker socks. If heel slip continues, try a different shoe brand with a narrower heel. |
| Numb toes or pinching on the sides of feet. | The shoe is too narrow in the toe box. | Switch to a “Wide” size option, or find a brand known for a wide, natural toe box. |
| Blisters between the toes. | Toe box is too tight, squishing toes together. | Size up or choose a wider shoe so toes can naturally splay out. |
How to Choose Your Hiking Shoe Size Step by Step
Finding the right fit doesn’t have to be a guessing game. If you follow this simple testing process, you can avoid the most common footwear mistakes. Here is the safest, most practical way to find your perfect size.
- Shop late in the afternoon. Your feet swell throughout the day. By 4:00 PM or 5:00 PM, your feet will be at their largest, which mimics how they will feel a few hours into a hike. Never try on new hiking shoes first thing in the morning.
- Bring your actual hiking socks. Do not use the thin nylon try-on socks the shoe store provides. Bring the exact merino wool or synthetic hiking socks you plan to wear on the trail. If you wear orthotic inserts, bring those too.
- Do the index finger test. Put the shoe on but do not tie the laces. Stand up and push your toes forward until they touch the front of the shoe. You should be able to slide your index finger between your heel and the back of the shoe. If you can’t fit a finger, the shoe is too small. If you can fit two fingers easily, it is too big.
- Check the toe box on a decline. Now, lace the boots up securely. Find a decline ramp in the store (most outdoor stores have them) or walk down a set of stairs. As you walk downhill, your toes should not hit the front of the boot. Your instep and ankle should hold your foot in place.
- Check for heel slip. Walk up the ramp or stairs. Does your heel lift dramatically out of the back of the shoe? A tiny bit of movement (about a quarter inch) is normal in stiff new boots, but your heel should not rub up and down aggressively.
- Test for width and toe splay. Stand naturally. You should be able to wiggle all your toes freely. Your pinky toe should not feel crushed against the side.
Common Mistakes to Avoid
Even if you know how to choose hiking shoes size properly, it is easy to get distracted by a good sale or a cool design. Avoid these common traps that hikers fall into:
- Assuming all brands fit the same: A size 10 in one brand might feel completely different than a size 10 in another. Some brands run narrow, while others have naturally wide toe boxes. Always judge by the fit, not the number on the box.
- Buying right before a big trip: Never take brand-new, unworn shoes on a long hike. You must test them on short walks around your neighborhood first to ensure the size is right and to break in the materials.
- Forgetting to trim your toenails: It sounds silly, but long toenails will hit the front of your boot and cause pain, tricking you into thinking the shoe is too small. Always trim them straight across before trying on shoes or going for a hike.
- Focusing only on length, not width: If a shoe feels tight on the sides, going up a size in length won’t fix the problem. You likely need a “Wide” model or a different brand entirely.
It is also important to practice good outdoor ethics while hiking. Once you have the right gear, be sure to review the Leave No Trace principles to ensure you are protecting the trails you enjoy.
Practical Trail Tips from Oscar
Over the years, I have tried dozens of different boots, trail runners, and hiking shoes. Sometimes a shoe is almost perfect but needs a tiny adjustment. Here are a few tricks I use to dial in the perfect fit.
Key Takeaways
- Always go up a half size to a full size from your everyday street shoes to accommodate foot swelling.
- Test your new shoes late in the day while wearing your actual thick hiking socks.
- Your toes should never touch the front of the shoe, especially when walking downhill.
- Ensure your heel stays securely in place when walking uphill to prevent painful friction blisters.
- Do not rely on breaking in a shoe to fix sizing issues; if it hurts in the store, it will hurt on the mountain.
Frequently Asked Questions
Should I buy hiking shoes a half size bigger?
Yes, buying hiking shoes a half size to a full size larger than your daily footwear is recommended. Your feet will swell from exertion and heat while hiking, and the extra space prevents your toes from smashing into the front of the boot on downhill sections.
How do I stop my toes from hitting the front of my boots?
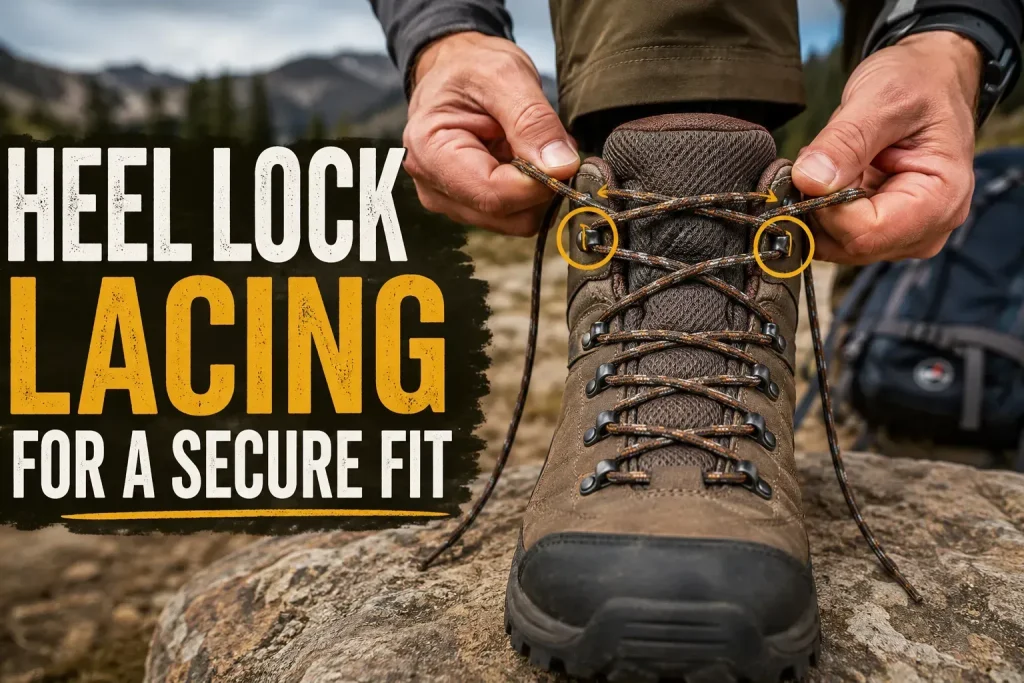
First, ensure you have the correct shoe size with enough length. If the size is correct, use a heel-lock lacing technique to secure your ankle in place. Tightening the laces across your instep will prevent your foot from sliding forward on descents.
Can I stretch hiking shoes that are too small?
Leather hiking boots will stretch slightly and conform to your foot over time, but they will only stretch in width, not in length. Synthetic hiking shoes and trail runners will barely stretch at all. If a shoe is too short, you cannot stretch it safely; you must size up.
What kind of socks should I wear when trying on hiking shoes?
Always wear the exact hiking socks you plan to use on the trail. Merino wool or synthetic blend socks are best because they wick moisture and prevent blisters. Avoid cotton socks, as they hold onto sweat and cause dangerous friction.
How should hiking boots fit around the ankle?
Hiking boots should fit snugly around the ankle to provide support and keep debris out, but they should not cut off your circulation or cause pinching. You should be able to flex your ankle comfortably to step over rocks and roots.
Is it normal for feet to swell while hiking?
Yes, foot swelling is a completely normal physical reaction to hiking. Gravity, continuous impact on hard surfaces, and body heat cause blood and fluids to pool in your lower extremities. This is why properly sizing up is essential for comfort.
Ready to Hit the Trail?
Finding the right size takes a little bit of patience, but it is entirely worth the effort. Once you have a pair of shoes that lock in your heel, give your toes room to breathe, and support your arches, your trail experience will completely transform. You won’t be thinking about foot pain; you will just be enjoying the fresh air and the scenery.
Before you head out on your next adventure, make sure your new shoes are broken in with a few laps around the neighborhood. If you are not sure what else to put in your backpack for your first trip, check out our full beginner hiking gear checklist to make sure you have all the essentials.
Stay safe, take care of your feet, and I will see you out on the trails!

2 thoughts on “How to Choose Hiking Shoes Size: A Practical Guide for Beginners”