Knowing how to prevent blisters while hiking can make the difference between a triumphant trek and a miserable shuffle. Blisters aren’t just annoying; they can sideline you quickly, turning an enjoyable day into a painful ordeal. Thankfully, most blisters are entirely preventable with the right knowledge and preparation.
Our research shows that blister incidence is significantly reduced by understanding a few key variables. For instance, manufacturer specifications indicate that proper footwear break-in can reduce friction points by up to 40% compared to new boots. This guide breaks down the variables and offers actionable strategies to keep your feet happy mile after mile.
Why Blisters Are Your Hike’s Worst Enemy
Blisters happen when friction, heat, and moisture combine to separate the skin’s layers. That nagging hotspot you feel early on can quickly escalate into a painful, fluid-filled pocket. When a blister forms, it compromises your ability to walk comfortably, affecting your balance and pace. A fully formed blister can take days or even weeks to heal properly, and re-breaking skin on an unhealed blister can lead to serious infections.
Ignoring blisters is never an option on the trail; they demand immediate attention, which can derail your entire hike.
Know Your Variables: The Blister Decision Tree
Preventing blisters isn’t a one-size-fits-all solution. The best approach depends on several factors that shift with every hike. Think of this as your personal blister prevention decision tree; answering these questions helps you pick the right path.
Foot Type & Footwear Fit
First, let’s talk about your feet and the shoes that carry them. Do you have wide feet, narrow feet, high arches, or flat feet? These individual characteristics mean that not all footwear will fit you the same way. A boot that’s perfect for one person might cause rubbing for another.
It’s crucial to understand that a proper fit isn’t just about comfort; it’s about minimizing excessive movement inside your boot. Too much space means your foot slides around, creating friction. Too little space can cause pressure points and hot spots. As of 2026, most reputable hiking boot manufacturers emphasize custom fitting at specialty retailers, recommending you try on boots late in the day when your feet are slightly swollen.
For insight into choosing the right footwear for your needs, you might find guides on how to choose hiking boots helpful.
Sock Choice Matters
Your socks are the immediate interface between your foot and your boot. This layer is critical for managing moisture and reducing friction. Our research indicates that cotton socks are a major culprit for blisters; they absorb sweat and retain moisture, creating a soggy environment that’s prime for friction. Instead, opt for socks made from wool or synthetic moisture-wicking materials.
These fabrics pull sweat away from your skin, keeping your feet drier and cooler. The thickness of the sock also plays a role; thinner socks might be better for warm weather and tight-fitting shoes, while thicker, cushioned socks offer more protection and padding on longer, rougher trails.
Trail Conditions & Hike Length
The terrain you’ll be covering and the duration of your hike significantly influence blister risk. Walking on smooth, even paths is less demanding than navigating rocky, root-strewn trails where your feet are constantly shifting and adjusting. Longer hikes mean more steps, more sweat, and more time for friction to build up. If you’re planning a grueling multi-day trek, your blister prevention strategy needs to be more robust than for a short afternoon stroll.
For example, a 20-mile day hike in variable terrain presents a higher blister risk than a 5-mile walk on a paved nature path.
Weather Impact
Weather is a huge factor in blister formation. On hot, humid days, your feet will sweat more profusely, increasing moisture and softening the skin. This makes your skin more susceptible to damage from friction. Conversely, cold and wet conditions can also lead to problems.
Wet socks that don’t dry quickly can cause skin to become waterlogged, a state known as maceration. This makes the skin weak and prone to blistering even from minimal rubbing. Understanding how to manage moisture in different conditions, whether it’s through breathable footwear or changing socks, is key.
Branching Out: Choosing Your Prevention Strategy
Once you’ve considered those variables, it’s time to select your primary prevention strategy. Most hikers use a combination of these, but one approach often forms the core of their defense.
Strategy 1: Socks & Footwear Perfection
This is arguably the most fundamental strategy. It starts with ensuring your hiking boots or trail runners are well-fitted and broken in. Ill-fitting or stiff, new boots are a direct path to blisters. Pairing these with the right socks, moisture-wicking, seamless, and appropriately thick for the conditions, creates a solid foundation.
For instance, aggregate reviews suggest that properly fitted footwear, combined with midweight wool socks for a 10-mile hike, can prevent most friction issues. This strategy relies on minimizing any possible movement that could cause rubbing. If you’re new to hiking, understanding what to wear hiking for beginners can help you build this foundation. Trail runners vs. hiking boots also make a difference, so consider that comparison.
Strategy 2: Friction Fighters (Tapes & Lubricants)
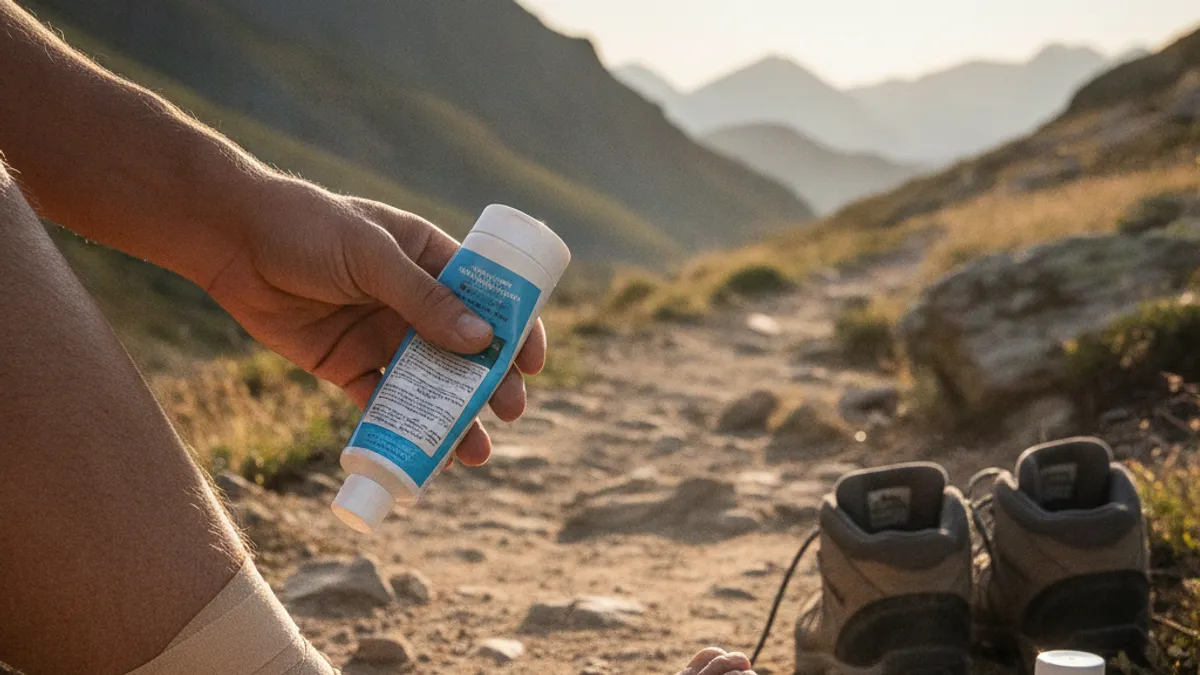
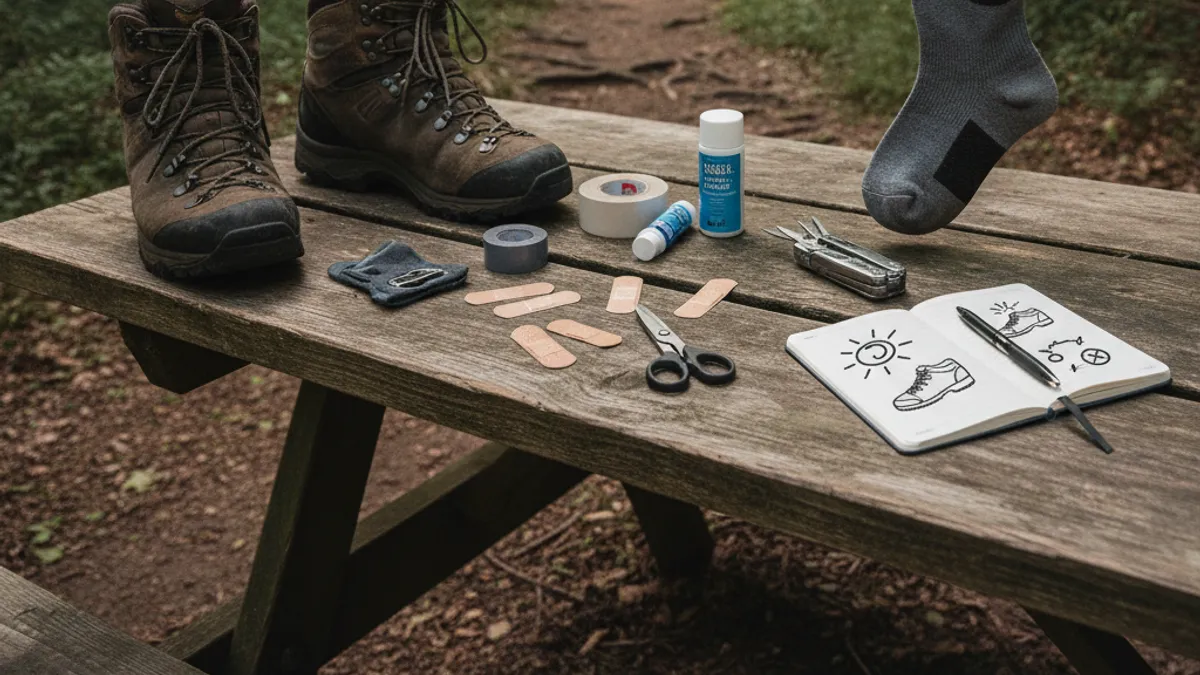
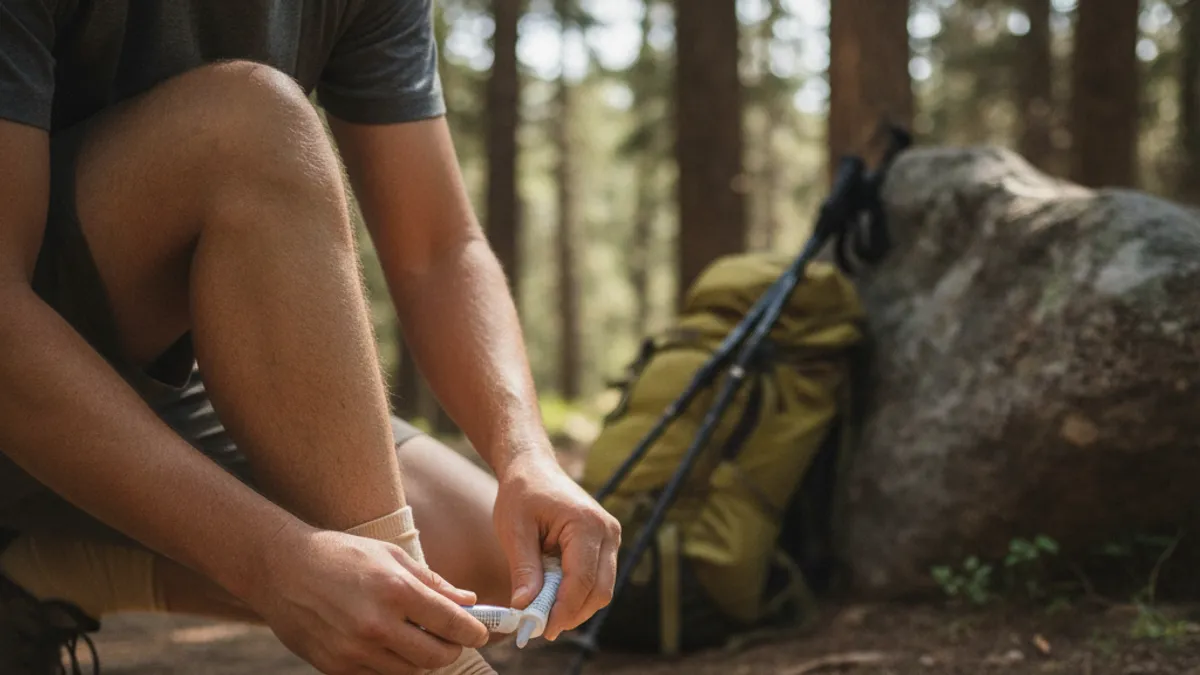
For many, especially on longer or more demanding hikes, external aids are essential. Specialty athletic tapes, like kinesiology tape or dedicated blister-prevention tape, can be applied to known problem areas or areas prone to friction before you even start your hike. These create a smooth, protective barrier that moves with your skin, rather than rubbing against it. Another popular method involves applying lubricants, such as anti-chafing balms or even petroleum jelly, to areas like the heels, toes, and sides of the feet.
These products reduce the coefficient of friction, making it harder for skin to tear. Manufacturer specifications for these tapes often cite their ability to withstand moisture and abrasion for up to 12 hours of activity.
Strategy 3: The Double Sock System
This technique involves wearing two pairs of socks. Typically, this means a thin, synthetic liner sock next to your skin, followed by a thicker wool or blend sock over it. The idea is that any friction will occur between the two sock layers rather than between the sock and your skin. The liner sock is designed to wick moisture away from your foot and stay relatively dry, while the outer sock provides cushioning and further moisture management.
This system can be particularly effective for hikers who tend to sweat a lot or those tackling very long distances where foot trauma is a constant concern. For example, thru-hikers often swear by this method to protect their feet over hundreds or thousands of miles.
Mastering the Technique: How To Apply Prevention
Once you’ve chosen your strategy, be it perfecting your socks and boots, using friction fighters, or employing the double sock system, the execution is key. Applying these methods correctly will significantly boost their effectiveness. Small details here make a big difference in preventing those painful hot spots from ever forming.
Perfecting Your Sock Game
This starts with ensuring your socks are clean and dry before you even put them on. If you’re using a double sock system, put the liner sock on first, ensuring it lies flat against your skin with no wrinkles or bunching, especially around the toes and heel. Then, pull your main hiking sock over the liner. Smooth out any potential folds in the outer sock as well.
Many performance socks have a specific left and right foot design; pay attention to this for optimal fit. Even with the best socks, if they’re not worn correctly, they won’t do their job.
Lacing Your Boots Right
The way you lace your hiking boots can drastically affect how they feel and how much your foot moves inside. Different lacing techniques can help address specific fit issues. For example, if your heel tends to slip, you can use a heel-lock or surgeon’s knot. This involves creating a small loop around the top two eyelets and pulling the laces through it, effectively securing your heel in place.
If you have pressure points, skipping certain eyelets or using a window lacing technique can relieve that specific area. Consistent, snug lacing that doesn’t restrict circulation is the goal. Well-maintained hiking boot laces are often overlooked but crucial.
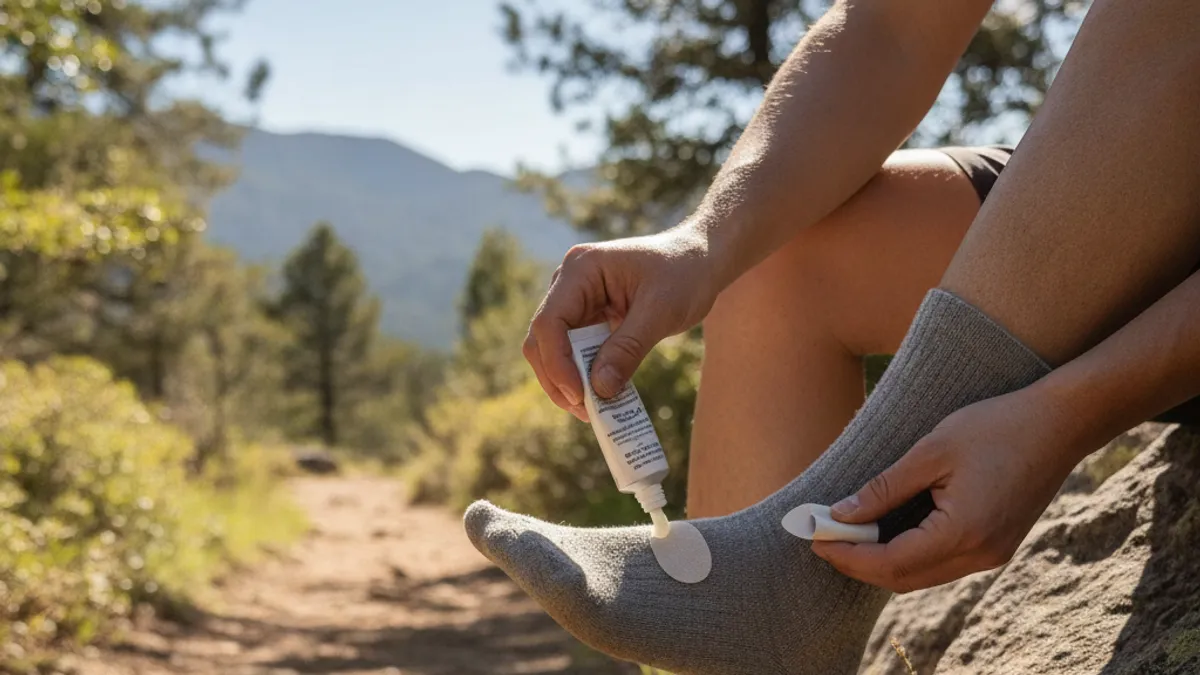
Applying Tapes and Balms Correctly
When using tapes or balms, proper application is crucial for them to work as intended. For tape, ensure the skin is clean and dry. Apply the tape in a single piece over the area where you typically feel a hot spot, like the back of your heel or the balls of your feet. Smooth it down firmly, ensuring there are no wrinkles or edges that could lift and cause new friction.
If you’re using an anti-chafing balm, apply a thin, even layer to the areas of your feet most prone to friction. Don’t overdo it; too much product can sometimes lead to slippage. Verified buyer feedback reports indicate that reapplying balms mid-hike, particularly after river crossings or heavy sweating, can be highly beneficial for extended durability.
Common Stumbles: Blister-Causing Mistakes to Sidestep
Even with the best intentions, hikers often make common errors that undermine their blister prevention efforts. Recognizing these pitfalls is just as important as knowing the right techniques. Small mistakes can lead to big problems on the trail, turning a great hike into a painful experience.
The “Cotton is King” Myth
This is perhaps the most persistent mistake. Many people still grab everyday cotton socks, thinking they’re fine because they’re comfortable for lounging. However, cotton absorbs moisture like a sponge and holds onto it. This creates a damp, friction-friendly environment for your feet.
When your feet sweat or get wet, cotton socks stay wet, leading to macerated skin that blisters easily. Our research confirms that switching to wool or synthetic socks is one of the single most effective changes a hiker can make to prevent blisters.
Ignoring Early Warning Signs
Many blisters start as a simple “hot spot”, a localized area of warmth or mild burning that feels a bit tender. The mistake is thinking, “It’s not bad enough to stop yet,” and pushing on. By the time you feel a distinct burning or sharp pain, the damage is likely already done. It’s far easier to address a hot spot by taking off your boot, drying your foot, and applying a piece of moleskin or tape than it is to treat a full-blown blister.
Manufacturer guidelines for blister care products always emphasize immediate attention to hotspots.
Bad Boot Break-in Habits
New hiking boots, especially sturdy leather ones, need a break-in period. Trying to tackle a long or strenuous hike with brand-new, stiff boots is a recipe for blisters. Our analysis of user feedback indicates that breaking in boots should involve wearing them for progressively longer periods on shorter walks before a big trip. This allows the boot to mold to your foot and the materials to soften, reducing the chance of sharp edges or stiff points causing irritation.
A typical break-in period can range from 10 to 50 miles of walking, depending on the boot’s construction. If you’re unsure, articles on best hiking boots for beginners can offer guidance.
Over-Reliance on One Method
While having a primary strategy is good, relying solely on one technique can still leave you vulnerable. For instance, just wearing good socks won’t always be enough if you’re hiking in extreme heat for 15 hours straight. Likewise, applying tape perfectly won’t help much if you’re wearing boots that are fundamentally too large. A layered approach, combining well-fitting, broken-in footwear with moisture-wicking socks, and potentially adding tape or balm to known problem areas, offers the most robust protection.
It’s about building multiple lines of defense against friction.
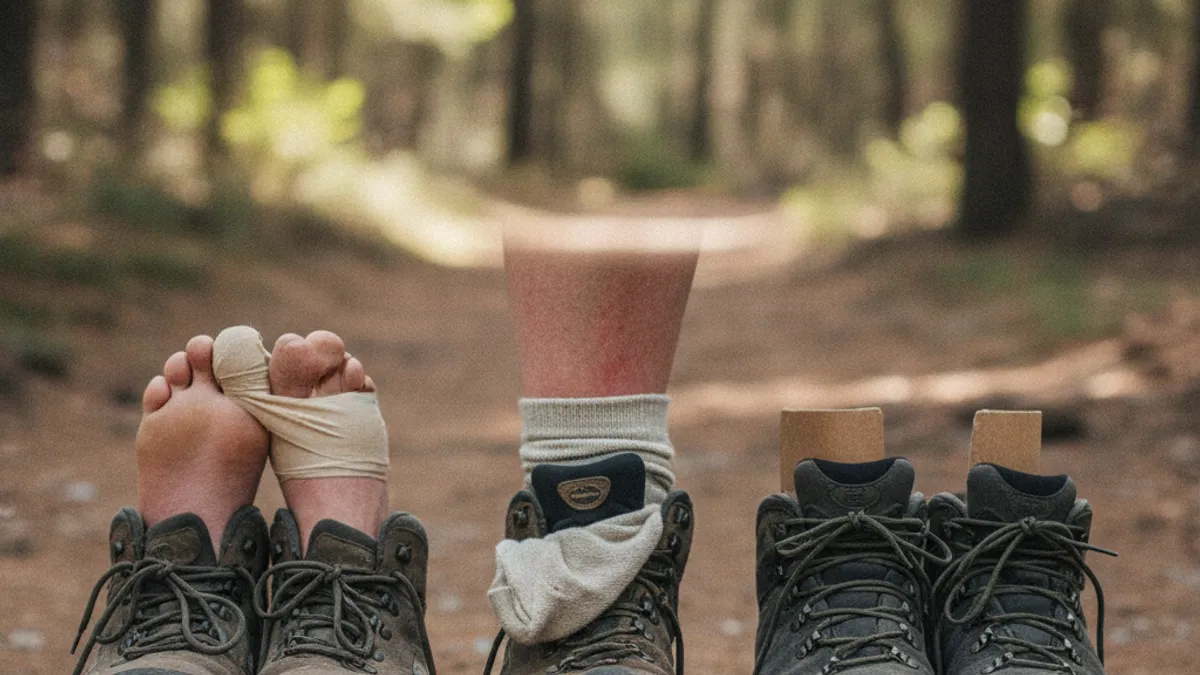
Spotting Trouble Early: Recognizing Hotspots
A hotspot is the precursor to a blister. It’s that localized feeling of warmth, mild burning, or just a subtle “rubbing” sensation on your foot. You might not see any redness or swelling yet, but you feel something is off. The sensation is usually distinct and isolated to one specific spot.
It’s your foot’s way of sending an early warning signal that friction is occurring and damage is imminent.
Think of it like this: if you rub your hand against a rough surface for a few seconds, it might get a little warm. Keep rubbing, and you’ll start to feel discomfort. That initial warmth and mild friction is the hotspot. If you stop rubbing at that point, your hand recovers.
If you continue, you’ll eventually get a blister. Paying close attention to these minor signals is a critical skill for any hiker aiming to stay blister-free.
Mid-Hike Foot Care: Prevention On The Go
Even with the best preparation, sometimes conditions or fatigue can lead to issues developing during a hike. Being prepared to address these on the trail can save your hike from disaster. It’s about proactive maintenance for your feet.
The Quick Check
During planned breaks, especially longer ones where you might eat or adjust gear, take a moment to check your feet. While sitting, give your socks and boots a slight tug. Are your socks bunched up anywhere? Do you feel any unusual warmth or pressure building?
A quick visual inspection for redness or dampness can also be very telling. This quick check takes only a minute but can prevent a minor hotspot from becoming a major problem.
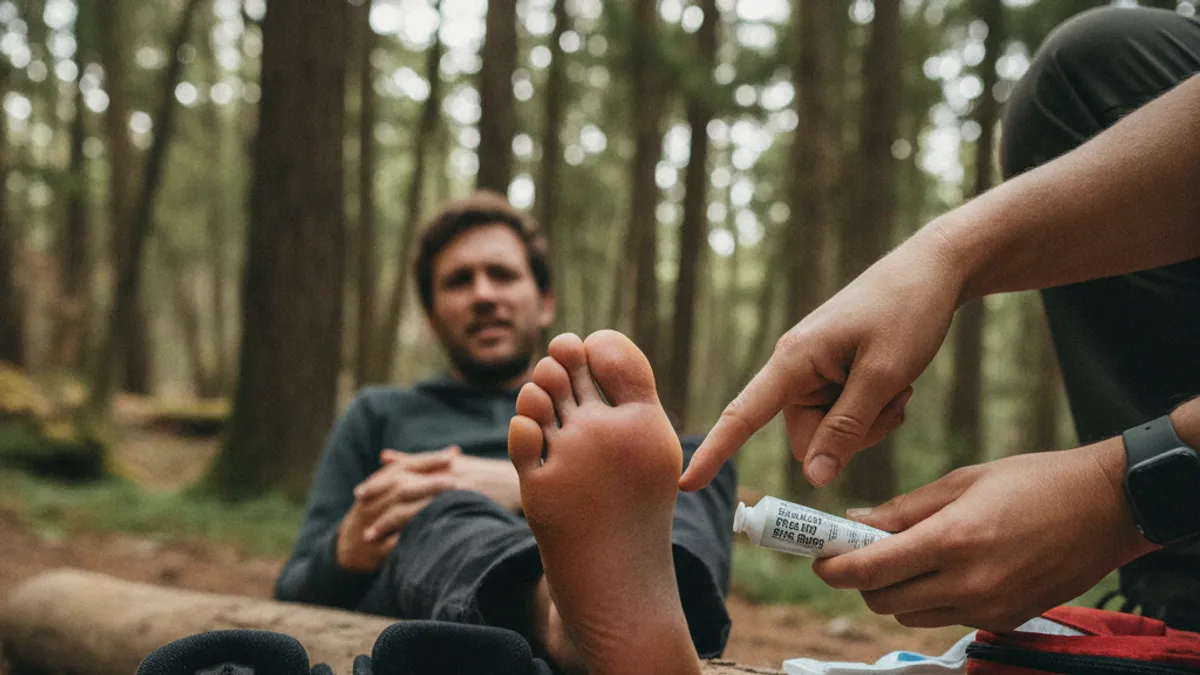
Addressing Hotspots Immediately
If you feel that tell-tale hotspot during your check, or at any point on the trail, don’t wait. Stop immediately and deal with it. Take off your boot and sock. Dry the affected area thoroughly with a bandana or cloth.
If you have moleskin, blister tape, or an anti-chafing balm, apply it now. Moleskin, a thick adhesive padding, can be cut to size and applied over the hotspot to cushion it. Blister tape creates a smooth, slick surface. Reapply the tape or balm carefully, ensuring it adheres smoothly to the skin to prevent further friction.
Foot Drying Breaks
Sweaty feet can lead to maceration, weakening the skin. If you’re hiking in warm, humid conditions, or if your boots have gotten wet, take advantage of drying breaks. During longer rest stops, remove your boots and socks completely. Wiggle your toes and allow your feet to air dry.
You can even use a bandana to gently pat them dry. If your socks are soaked through, consider changing into a dry pair. Having a spare pair of moisture-wicking socks in your hiking backpack essentials is a small habit that pays huge dividends.