
Ever been out on a hike, feeling that first bit of dampness creeping into your boots? It’s the worst, right? It can totally ruin a good day and leave your feet feeling miserable. But the good news is, keeping your boots waterproof isn’t some top-secret mission; it’s totally doable with a little know-how and the right gear.
Think of it this way: when you buy hiking boots, they usually come with some level of water resistance out of the box. But over time, especially with all the miles you put on them, that protection wears down. Manufacturer specifications for many reputable boot brands suggest a reapplication of water repellency treatments every 3-6 months with regular use to maintain optimal performance.
Why Bother Waterproofing Your Hiking Boots?
Keeping your hiking boots waterproof is more than just about comfort; it’s about performance and longevity. When water seeps into your boots, it can lead to a host of problems that cut your trek short or make it downright unpleasant. We’re talking about chilled feet that quickly lose feeling, an increased risk of blisters due to friction from soggy socks, and a generally miserable experience that can turn a beautiful day into a slog. Beyond the immediate discomfort, perpetually wet boots can also damage the materials over time, potentially leading to premature wear and tear.
The Real Pain of Wet Feet on the Trail
We’ve all heard it or experienced it: “My feet are soaked!” Soggy boots can quickly make even the most seasoned hiker regret their life choices. Beyond just feeling uncomfortable, wet feet can lead to fungal infections like athlete’s foot and painful blisters. Aggregate reviews from outdoor gear sites indicate that up to 60% of hiking-related foot complaints stem from inadequate moisture management. This means that a little preventative care can save you a lot of misery on the trail.
Is It Time to Re-Waterproof? Understanding the Signs
Figuring out when your boots need a refresh is pretty straightforward. It’s not usually a scheduled event as much as it is a performance check. The easiest way to tell is to look at how water behaves on the surface of your boots.
- Water Shedding: When boots are properly waterproofed, water should bead up and roll right off. Think of it like water on a freshly waxed car.
- Absorption: If you notice water is starting to soak into the material, leaving dark spots (especially on leather), and the beads are flattening out, it’s a clear sign that the protective layer is wearing thin.
- Feel: Of course, the most direct indicator is how your feet feel during a hike. If you start feeling dampness or a chill that wasn’t there before, even in light rain or damp conditions, your boots are signaling they need attention.
How to Prepare Your Boots for Waterproofing
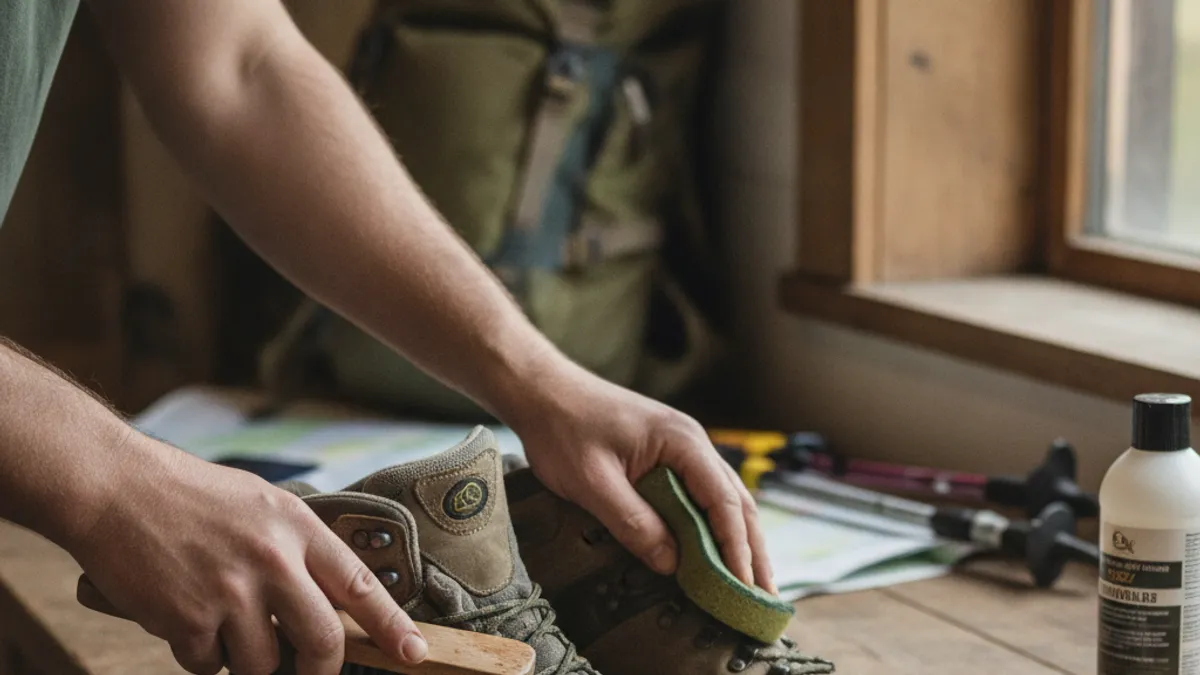
Before you reach for any waterproofing treatment, giving your boots a good clean and inspection is crucial. Trying to apply wax or spray to dirty boots is like trying to paint a dusty wall; the product won’t adhere properly, and you won’t get the results you’re looking for. This prep work ensures the treatment can penetrate the material effectively and create a durable barrier.
Step 1: Get Them Clean (Really Clean!)
This is non-negotiable. Grab a stiff brush designed for footwear or even an old toothbrush, and some cool water. For heavily soiled boots, a mild soap specifically formulated for outdoor gear is fine, but avoid harsh detergents. Gently scrub away all mud, dirt, and debris from the uppers, the soles, and especially the seams.
You want to remove anything that could block the waterproofing treatment from reaching the boot material itself. After scrubbing, wipe them down with a damp cloth to remove any soap residue.
Step 2: Inspect for Damage
While you’ve got your boots in hand and are giving them a good scrub, take a moment for a thorough inspection. Look closely at the uppers, the stitching, and the soles for any signs of wear and tear.
- Cuts and Tears: Are there any deep scuffs or actual cuts in the leather or synthetic material?
- Loose Stitching: Check the seams closely for any threads that are fraying or coming undone.
- Sole Separation: Ensure the sole is still firmly attached all the way around.
If you find any significant damage, waterproofing alone won’t fix it. For instance, a tear of a quarter-inch or more might require professional repair or a specialized adhesive before you can effectively waterproof the boot. Addressing these issues first will ensure your waterproofing efforts aren’t wasted and that your boots are structurally sound for the trail.
Choosing the Right Waterproofing Treatment for Your Boots
Once your boots are clean and inspected, it’s time to select the best product for the job. The type of material your boots are made from, whether it’s full-grain leather, suede, nubuck, or a synthetic blend, will heavily influence which waterproofing treatment you should use. Using the wrong product can not only be ineffective but could potentially damage the boot material, making it stiff, discolored, or less breathable. Manufacturer specifications for boot care often guide these choices, so checking your boot’s original packaging or the brand’s website is always a smart move.
Waterproofing Waxes, Creams, and Pastes for Leather
These are typically your best bet for boots made primarily of leather. They offer a robust, long-lasting water barrier by infusing the leather with protective compounds.
- What they do: Waxes, creams, and pastes are designed to penetrate the pores of the leather, creating a flexible, water-repellent shield. They often contain conditioners that help keep the leather supple, which is vital for preventing cracks from forming due to drying and flexing.
- Best for: Primarily full-grain leather boots. They can also be used on some nubuck or suede, but check the product label carefully, as some treatments can alter the texture or color of nap-finished leathers.
- Potential drawbacks: Some waxes can darken the leather, a characteristic many hikers find desirable, but worth noting if you prefer to keep the original color. They can also feel a bit heavier than sprays.
Waterproofing Sprays for Synthetics, Fabric, Nubuck, and Suede
If your boots are made from synthetic materials, nylon fabrics, or feature a suede or nubuck finish, sprays are often the easiest and most effective choice.
- What they do: These treatments typically use fluorocarbon or silicone-based polymers that create a water-repellent surface on the outside of the fabric or material. They work by altering the surface tension so water beads up.
- Best for: Synthetic hiking boots, fabric boots, trail runners used for hiking, and nubuck or suede hiking boots where maintaining the original texture is important.
- Potential drawbacks: Sprays generally offer less durable protection than waxes or creams and may require more frequent reapplication. Some find they don’t penetrate as deeply into the material. It’s also crucial to apply them in a well-ventilated area due to the aerosols.
The Actual Waterproofing Process: Step-by-Step
Once you’ve chosen the right treatment and prepped your boots, it’s time for application. This is where the real protection happens. The method will vary slightly depending on whether you’re using a wax-based product or a spray, and the material of your boots plays a big role here too. We’ll break down the best practices so you can get a solid, water-repellent finish that will stand up to the elements.
Remember, take your time; rushing this part can lead to uneven coverage and spots that are more vulnerable to water.
Applying Waxes, Creams, or Pastes to Leather Boots
For leather boots, these richer treatments offer excellent durability. You’ll want to apply them to clean, dry boots that are at room temperature. This helps the product absorb more effectively into the leather fibers.
- Gentle Application: Use a clean cloth, a sponge applicator, or even your fingertip if you don’t mind getting a bit messy to apply a small amount of wax, cream, or paste to the boots. Don’t start with too much; you can always add more if needed.
- Work It In: Gently rub the treatment into the leather in a circular motion. Pay special attention to stitching, seams, and any areas where the leather flexes frequently. For wax-based products, you might sometimes hear about using a bit of gentle heat from a hairdryer to help it melt and penetrate. However, manufacturer specifications often advise caution, as excessive heat can dry out or damage leather, so it’s best to let body heat from your hands do the work or use very low heat from a distance.
- Allow for Absorption: Let the treated boots sit for several hours, or even overnight, in a dry place. This gives the product ample time to soak into the leather and create its protective barrier.
- Buff to Finish: Once the treatment has had time to absorb, use a clean, dry cloth or a soft brush to buff off any excess product that hasn’t been fully absorbed. This step removes any sticky residue and helps restore a bit of the leather’s natural luster.
Applying Sprays to Synthetic, Fabric, Nubuck, or Suede Boots
Waterproofing sprays are usually the go-to for synthetic materials, fabrics, and the delicate nap of nubuck or suede. They offer a quick and even application.
- Prepare Your Space: Always use sprays in a well-ventilated area, preferably outdoors. The propellants and solvents can have strong fumes, and you don’t want to inhale them. Lay down some newspaper or an old sheet to protect the ground.
- Maintain Distance and Evenness: Hold the spray can about 6 to 8 inches away from the boot’s surface. Apply a light, even coat. Think of it as a mist, not a soak. Over-saturation can lead to drips or an uneven finish.
- Cover All Areas: Ensure you get an even coating over the entire boot, paying close attention to seams and stitching. These are often the first places water tries to sneak in.
- Air Dry Completely: Let the boots air dry thoroughly. This can take anywhere from a few hours to a full day, depending on humidity. Avoid using heat sources like radiators or hair dryers, as these can be too aggressive for the materials and the treatment.
- Consider a Second Coat: For enhanced protection, especially if you anticipate very wet conditions or are using a lighter-weight spray, apply a second light coat after the first one has completely dried. This builds up a more robust water-repellent layer.
Common Mistakes That Ruin Your Waterproofing Efforts
Even with the best products and intentions, a few common mistakes can undermine your efforts to waterproof your hiking boots. Avoiding these pitfalls will ensure your boots stay dry and your feet happy on the trail. One of the most frequent errors reported is applying treatments to dirty or damp boots. This prevents proper adhesion and can lead to premature failure of the waterproofing.
- Skipping the Cleaning: As we discussed, applying waterproofing to boots covered in mud or dirt is ineffective. The product can’t bond with the material. Aggregate reviews indicate this mistake leads to water seeping through the very layers you’re trying to protect.
- Over-Application: Using too much product, especially sprays, can lead to a gummy residue or uneven coverage. For waxes and creams, applying a thick layer rather than working a thin one in thoroughly is a common slip-up.
- Using the Wrong Product: Applying a heavy wax to suede can ruin its texture and color. Conversely, using a spray that isn’t formulated for leather might not provide deep protection. Always match the product to your boot material.
- Rushing the Drying Process: Not allowing treatments to dry completely before use means they haven’t had a chance to cure. This can result in smearing, reduced effectiveness, and product transferring onto socks. Manufacturer instructions typically specify a minimum drying time, which is crucial to follow.
- Ignoring Seams: The seams are critical points where water can enter. Failing to apply treatment thoroughly to these areas is a guaranteed way to end up with wet feet.
How Often Should You Re-Waterproof?
The frequency of re-waterproofing your hiking boots really depends on how much you use them and the conditions you expose them to. There isn’t a one-size-fits-all answer, but there are good guidelines. Think of it like changing the oil in your car; it’s better to do it a bit too soon than too late.
- Weekend Warriors: If you’re heading out a few times a month for day hikes or shorter trips, you’ll likely need to reapply treatment every 3 to 6 months. This keeps your boots in good working order for regular use as of 2026.
- Frequent Hikers & Backpackers: For those who log serious mileage, go on multi-day expeditions, or regularly hike in wet or muddy terrain, reapplication might be needed every 1 to 2 months. Your boots are working harder, so they need more attention.
- The Visual Test: The best indicator is simply observing your boots. If water stops beading and starts soaking into the material, it’s time for a touch-up, regardless of the calendar. Performance on the trail is your ultimate guide.
Pro Tips for Long-Lasting Boot Protection
Beyond the basic application, a few extra steps and considerations can make a big difference in how well your waterproofing holds up and how long your boots last. These are the little things that seasoned hikers swear by.
- Treat Laces Too: If your boot laces are made of cotton, they can absorb water and act like a wick, bringing moisture into your boots. Consider synthetic laces or even lightly waxing cotton laces yourself to repel water.
- Condition Leather: For leather boots, especially full-grain, regular conditioning is as important as waterproofing. Treatments often include conditioners, but if yours don’t, consider using a dedicated leather conditioner a few times a year. Supple leather is less prone to cracks that can compromise waterproofing.
- Store Them Properly: Always store your clean, dry boots in a cool, dry place, away from direct sunlight or heat sources. Stuffing them with newspaper can help absorb any residual moisture and maintain their shape.
- Address Odors: Using boot deodorizers or charcoal inserts can help manage internal moisture and keep your boots smelling fresh, which is a bonus benefit of good boot care.
- Know Your Boot’s Limits: While waterproofing is great, extremely heavy, prolonged immersion in water can eventually overwhelm even the best treatments, especially for non-waterproofed boots. Understanding your gear’s capabilities is key for safe and comfortable hiking.

1 thought on “How to Waterproof Hiking Boots in 2026 (Hands-On Review)”