
Getting out on the trail should feel like a breath of fresh air, not a struggle against ill-preparedness. Knowing what to pack can make the difference between an amazing adventure and a frustrating experience. We’ve gathered the most crucial items to ensure you have the must have gear for hiking.
Our research points to a consensus among seasoned hikers and outdoor experts: focusing on a few key pieces of equipment drastically improves safety and enjoyment. For instance, manufacturer specifications for modern hiking daypacks often highlight capacities ranging from 20 to 35 liters, ideal for carrying essentials while balancing weight. Let’s break down exactly what you need to consider.
Why Hiking Gear Matters for Your Trip
The right gear isn’t just about comfort; it’s fundamentally about safety and enhancing your overall experience on the trail. Think of it like this: your hiking boots are your foundation, your backpack is your mobile base camp, and your hydration system is your lifeline. Without these core pieces performing as they should, even a short excursion can become uncomfortable or downright dangerous.
Our research into common hiking mishaps reveals that a significant percentage are linked to inadequate gear. This can range from blisters caused by improper footwear to heat exhaustion from insufficient water. Conversely, well-chosen equipment can mitigate risks like hypothermia, dehydration, and getting lost. It also allows you to carry the necessary supplies for extended outings and changing conditions.
Hiking Backpacks: Choosing the Right Size and Fit
Your hiking backpack is arguably your most important piece of gear. It’s what carries everything else, so getting it right sets the stage for a successful hike and comfortable journey. The wrong pack can cause serious discomfort, throw off your balance, and lead to fatigue much faster than you’d expect.
Backpack Capacity: Day Hikes vs. Overnight Trips
The capacity of a hiking backpack is measured in liters, indicating how much volume it can hold. This is a primary factor in choosing a pack that suits your planned trips.
- Day Hikes: For outings lasting just a few hours to a full day, a smaller pack is usually sufficient. We’re talking capacities typically between 20 to 35 liters. This allows you to comfortably carry essentials like water, snacks, a light jacket, a first-aid kit, and navigation tools without feeling weighed down. Think of what to bring on a day hike, it all needs to fit.
- Overnight Backpacking: If you plan to spend one or two nights on the trail, you’ll need a larger pack. These generally range from 35 to 55 liters. This increased volume is necessary to accommodate a sleeping bag, sleeping pad, a lightweight tent or shelter, more substantial food supplies, and potentially cooking gear.
- Multi-Day Expeditions (Thru-Hiking): For trips lasting three or more days, or for thru-hiking endeavors, capacities often start at 60 liters and go up from there. These larger packs are designed to carry a significant amount of gear for extended periods, requiring careful weight distribution and a robust suspension system. Understanding what is thru hiking gives you context for the gear demands.
Backpack Features: What to Look For
Beyond capacity, several features contribute to a backpack’s functionality and comfort.
- Suspension System: This includes the shoulder straps, hip belt, and back panel. Look for padded, adjustable straps and a supportive hip belt that transfers weight from your shoulders to your hips. This is crucial for carrying heavier loads comfortably for longer periods.
- Material: Durable, water-resistant materials like ripstop nylon or polyester are common. They need to withstand abrasion from branches and rocks. Some packs offer enhanced water protection, which can be a lifesaver.
- Pockets and Compartments: External pockets for water bottles, trekking poles, and easy-access items are very handy. Internal organization helps keep smaller gear sorted.
- Ventilation: A well-designed back panel can provide airflow, preventing your back from getting excessively sweaty, especially in warmer weather or during strenuous climbs.
- Adjustability: Most quality packs offer adjustable torso lengths and strap configurations, allowing you to dial in a precise, comfortable fit. This is key because a properly fitted pack feels much lighter than an ill-fitting one.
Hiking Boots: Support, Traction, and Comfort
Your feet are your primary mode of transportation on the trail, so protecting them and keeping them comfortable is paramount. The right hiking boots or shoes can make miles feel much easier, while the wrong ones can lead to blisters, pain, and even injuries. Understanding the differences and options is key to selecting footwear that matches your hiking style and terrain.
Hiking Boot Types: Shoes vs. Boots
The world of hiking footwear isn’t a monolith; there are several categories designed for different needs. Our research indicates a clear distinction based on ankle support and overall ruggedness.
- Hiking Shoes: These are low-cut, similar to sturdy athletic shoes. They offer good cushioning and flexibility, making them ideal for well-maintained trails, day hikes, and faster-paced treks. They provide less ankle support but are lighter and require less break-in time. Many trail runners can also serve this purpose, offering a lighter alternative for those who prefer minimal footwear. If you’re curious about the comparison, check out Trail Runners Vs Hiking Boots.
- Mid-Cut Hiking Boots: These extend slightly above the ankle, offering more support and protection than shoes. They’re a versatile choice for moderate terrain and day hikes where you might encounter uneven ground or need a bit more stability.
- High-Cut Backpacking Boots: These are the most robust option, extending well above the ankle. They offer maximum support and protection, making them suitable for rugged, off-trail terrain, carrying heavy loads, and longer backpacking trips. They are typically stiffer and require a longer break-in period. Many beginners look for best hiking boots for beginners and often find mid-cut boots a good starting point.
- Waterproof vs. Non-Waterproof: Many hiking boots come with waterproof membranes like Gore-Tex. These keep your feet dry from external moisture (rain, puddles, streams) but can sometimes reduce breathability, leading to sweaty feet in hot conditions. Whether they are worth it depends heavily on the typical conditions you’ll be hiking in; waterproof hiking boots worth it explores this in detail.
Boot Fit: The Key to Happy Feet
Regardless of the type, the fit is the single most important factor. A boot that fits poorly will cause problems, no matter how high-tech its features are.
- Try Them On: Always try on hiking boots before buying, preferably later in the day when your feet are slightly swollen.
- Wear Your Hiking Socks: Bring the type of socks you plan to wear on the trail to get an accurate fit.
- Check the Length: You should have about a finger’s width of space between your longest toe and the end of the boot when your heel is firmly against the back. Kick your foot gently against a hard surface; your toes shouldn’t jam into the front.
- Check the Width: The boot should feel snug but not constricting across the widest part of your foot.
- Heel Lock: Your heel should not lift significantly when you walk. Some minor lift is okay if it stops once broken in, but excessive slipping will cause blisters.
- Arch Support: Ensure the boot’s arch complements your foot’s natural arch.
- Flex Point: The boot should flex where your foot naturally bends at the ball.
Remember that even the best boots need a bit of a break-in period. Follow guidance on how to choose hiking boots for a comprehensive look at the selection process.
Staying Hydrated: Water Bottles and Hydration Reservoirs
Water is essential for life, and it’s absolutely critical when you’re exerting yourself outdoors. Dehydration can set in quickly on a hike, leading to fatigue, headaches, dizziness, and in severe cases, heatstroke. Having a reliable way to carry and access water is non-negotiable for any hike.
Water Bottles vs. Hydration Reservoirs (Bladders)
Both water bottles and hydration reservoirs, often called “bladders,” serve the same fundamental purpose but offer different user experiences and benefits.
- Water Bottles:
- Pros: Easy to see how much water you have left, simple to refill, durable (especially Nalgene-type bottles), can be used for other purposes like boiling water if made of suitable material.
- Cons: Requires stopping and reaching into your pack to drink, can be bulky if carrying multiple bottles in side pockets.
- Capacity: Typically 1-2 liters per bottle. You’ll need to plan how many you’ll carry based on the hike’s duration and water availability. For guidance on planning, see How Much Water To Drink Hiking.
- Hydration Reservoirs:
- Pros: Allows for easy, on-the-go sipping via a bite valve, encouraging more frequent hydration. Can distribute weight more evenly inside the backpack.
- Cons: Harder to gauge remaining water level without removing from the pack, can be more difficult to clean thoroughly, might require a specific pack design to accommodate.
- Capacity: Commonly range from 1.5 to 3 liters.
- Notes: Ensure your backpack has a dedicated sleeve and hose port for the reservoir if you choose this option. Maintaining proper hydration involves more than just carrying water; it’s also about what you drink. For instance, considering electrolytes for hiking can be beneficial on longer or hotter treks.
Accessing Water on the Trail
It’s important to scout out reliable water sources on longer hikes. If you plan to refill, you’ll need a way to purify the water.
- Water Filters: Mechanical filters use a pump or gravity to force water through a fine sieve, removing bacteria and protozoa.
- Water Purifiers: These use chemical treatments (like iodine or chlorine dioxide tablets) or UV light to kill viruses, bacteria, and protozoa. They are often lighter and simpler than filters.
- Boiling: While effective, this uses fuel and time. It’s usually a backup method.
Planning your water strategy is a key part of how to stay hydrated on a hike.
Navigation Tools: Never Get Lost on the Trail
Getting disoriented on the trail can range from a minor inconvenience to a serious safety concern. Relying solely on your phone’s GPS can be risky due to battery life issues or spotty service. A solid understanding of traditional navigation methods, combined with modern tech, is the safest approach.
Our research indicates that experienced hikers consistently carry multiple navigation redundancies. This ensures they have a backup if one method fails. As of 2026, cell service remains unreliable in many remote hiking areas, making it essential to have offline capabilities.
Map and Compass Basics
These are the tried-and-true tools that have guided explorers for centuries.
- Topographic Map: This is not just a road map. A topographic map shows elevation changes with contour lines, indicating hills, valleys, and the steepness of slopes. It details trails, water sources, and other natural and man-made features. Familiarize yourself with the map’s legend to understand symbols.
- Baseplate Compass: Learn how to orient your map to north and use the compass to determine your bearing (direction of travel). Practicing these skills before you hit the trail is vital. Holding the map and compass together and aligning them correctly is a fundamental skill.
GPS Devices and Apps
Modern technology offers powerful tools, but they should complement, not replace, a map and compass.
- Dedicated GPS Devices: These are rugged handheld units designed for outdoor use. They often have longer battery life than smartphones and can store detailed maps.
- Smartphone GPS Apps: Many excellent apps (like Gaia GPS, AllTrails, or CalTopo) allow you to download maps for offline use. Ensure you pre-download the map of your hiking area before you lose service. The battery drain on smartphones can be significant, so consider a portable power bank.
When relying on digital tools, always think about power: a dead battery means zero navigation. A simple headlamp or flashlight is a must-have for late finishes or unexpected situations. Check out Hiking Headlamp Reviews if you’re looking for options.
Essential Lighting: Headlamps and Flashlights
Completing a hike after dark, whether planned or unplanned, requires dependable light. A headlamp is generally preferred over a handheld flashlight because it keeps your hands free, which is incredibly useful for tasks like setting up camp, cooking, navigating, or managing a first-aid situation.
Headlamp Features to Consider
When selecting a headlamp for hiking, look for these attributes:
- Brightness (Lumens): For general trail use, 100-200 lumens is often sufficient. Higher lumens (300+) are useful for fast hiking on technical terrain or searching. Per ANSI/PLATO FL1 standards, lumens measure light output.
- Battery Life: This is critical. Look for a headlamp that can last for your longest expected hike in the dark, plus a buffer. Many offer multiple brightness settings, so conserve power when possible. Rechargeable lithium-ion batteries are common, but carrying spare disposable batteries (like AA or AAA) is a good backup.
- Beam Type: Some headlamps offer a focused spot beam for distance, while others have a wide flood beam for close-up visibility. Many have adjustable beams or multiple LED types to offer a combination.
- Water Resistance: Look for a rating of at least IPX4 (splash-proof) to withstand rain or splashes. Higher ratings offer better protection against submersion.
- Comfort and Fit: The headlamp should be comfortable to wear for extended periods and stay securely in place. Adjustable straps are a must.
Flashlights as a Backup
While a headlamp is primary, a small, lightweight flashlight can serve as a useful backup. It’s compact, can be easier to manage for quick tasks like finding something in your pack or signaling, and provides an alternative power source if your headlamp uses a different battery type. Knowing how to conserve battery and when to switch to a backup can prevent being caught in darkness.
First-Aid Kit: Be Prepared for Minor Injuries
A well-stocked first-aid kit is absolutely non-negotiable for any hiker. Even on short, familiar trails, minor injuries can occur. Having the right supplies at hand can prevent a small scrape from becoming a larger problem, or manage a sprain until you can get proper medical attention.
What Should Be in Your Hiking First-Aid Kit?
The contents will vary slightly based on the length and remoteness of your hike, but our research suggests a core set of items is essential for most trips.
- Wound Care:
- Adhesive bandages in assorted sizes.
- Sterile gauze pads (various sizes).
- Adhesive tape to secure bandages.
- Antiseptic wipes or cleaning solution (like povidone-iodine or saline).
- Antibiotic ointment.
- Pain and Allergy Relief:
- Pain relievers (e.g., ibuprofen, acetaminophen).
- Antihistamines (for allergic reactions).
- Tools and Supplies:
- Tweezers (for splinters, thorns).
- Small scissors.
- Safety pins.
- Medical gloves.
- Specific Needs:
- Any personal medications you require.
- Blister treatment (moleskin, specialized blister bandages).
- Emergency whistle for signaling.
Our analysis of user feedback often highlights that hikers frequently overlook items like moleskin for blister prevention. It’s far better to treat an emerging hot spot before it becomes a full-blown blister. Consider a kit from a reputable outdoor gear manufacturer, or build your own starting with a durable, water-resistant pouch.
Sun Protection: Shielding Yourself from the Elements
Exposure to the sun’s ultraviolet (UV) rays can cause sunburn, heatstroke, and long-term skin damage, even on cloudy days. Protecting your skin and eyes is critical, especially when hiking in open areas or at higher elevations where UV intensity is greater.
Sunscreen, Hats, and Sunglasses
These are your primary defenses against the sun.
- Sunscreen: Choose a broad-spectrum sunscreen with an SPF (Sun Protection Factor) of 30 or higher. This means it protects against both UVA and UVB rays. Reapplication is key; most sunscreens need to be reapplied every two hours, or more often if you’re sweating heavily or swimming. For prolonged sun exposure, look for sunscreens rated for water resistance.
- Hats: A wide-brimmed hat offers excellent protection for your face, ears, and neck. Look for hats made of lightweight, breathable materials with a UPF (Ultraviolet Protection Factor) rating for enhanced shielding. Baseball caps protect your face but leave your neck and ears exposed.
- Sunglasses: Protect your eyes from UV damage. Look for sunglasses that block 99-100% of UVA and UVB rays. Polarized lenses can reduce glare, making it easier to see in bright conditions, especially around water.
Remember that UV rays are more intense at higher altitudes and closer to the equator. Even a short hike requires some level of sun protection. Proper application of sunscreen and wearing protective gear are simple steps that significantly reduce your risk of sun-related ailments.
Appropriate Clothing Layers: Adapting to the Weather
The most versatile way to dress for hiking is by using a layering system. This allows you to adjust your clothing to match changing weather conditions and your body’s exertion level, preventing you from overheating or getting too cold. The goal is to manage moisture and maintain a comfortable core temperature.
Base Layers, Mid Layers, and Outer Shells
This system uses three main types of clothing.
- Base Layer: Worn next to your skin, its primary job is to wick away moisture (sweat) from your body to keep you dry. Merino wool and synthetic fabrics (like polyester or nylon) are excellent choices because they retain insulating properties even when damp. Cotton is generally discouraged as a base layer because it absorbs moisture and stays wet, leading to chilling.
- Mid Layer: This layer provides insulation. Fleece jackets, down vests, or synthetic insulated jackets are common mid-layers. The thickness of your mid-layer will depend on the ambient temperature. You might wear a light fleece on a cool day or a puffy jacket when it’s significantly colder.
- Outer Shell: This is your protective barrier against the elements. A waterproof and breathable jacket (often called a rain jacket or hardshell) shields you from wind and rain. Some outer shells are designed primarily for wind resistance (softshells) and offer good breathability but less water protection.
Layering Strategy:
- Cooler Weather: Start with a base layer, add a mid-layer for warmth, and top with a shell if windy or wet.
- Warmer Weather/High Exertion: You might only need a wicking base layer. Wear it only, or pair it with a lightweight windbreaker if conditions demand.
- Uphill/Cooling Down: As you climb and warm up, shed layers, starting with the outer shell, then the mid-layer. As you reach a summit or start descending, you’ll put layers back on to prevent chilling.
Understanding how to properly dress for any weather condition is a fundamental aspect of what to wear hiking for beginners.
Trekking Poles: Support and Balance on Any Terrain
While not strictly “essential” for every short hike, trekking poles offer significant benefits for many hikers, particularly on longer or more challenging routes. They act like extensions of your arms, providing extra points of contact and support. This can ease the load on your joints and improve your overall stability.
How Do Trekking Poles Help?
- Reduced Joint Strain: By transferring some of your body weight to your arms and shoulders, trekking poles can reduce the impact on your knees and hips by up to 20-25%, according to various biomechanical studies. This is especially noticeable on descents.
- Improved Balance: A lost footing can quickly turn into a fall. The extra points of contact provided by poles significantly enhance your stability, reducing the risk of stumbling, especially on uneven, slippery, or rocky trails.
- Enhanced Propulsion: On ascents, poles can help you push off the ground, providing an extra source of power. This can make climbs feel less strenuous and faster.
- Assistance in Crossing Streams: They provide an extra point of stability when navigating rocky stream beds or making uncertain footing.
What to Look for in Trekking Poles
- Adjustability: Most modern poles are adjustable in length, allowing you to customize them for different terrains (shorter for ascents, longer for flats or descents) and for storage. Look for secure locking mechanisms.
- Material: Aluminum is durable and affordable, while carbon fiber is lighter but more expensive and can be more brittle.
- Grips: Comfortable, ergonomic grips made of cork or foam wick away sweat and prevent blisters.
- Straps: Adjustable wrist straps help distribute pressure and prevent you from dropping the poles. Learn how to use hiking poles correctly to get the most benefit.
- Tips and Baskets: Poles come with various tips for different surfaces. Rubber tips are quieter on hard surfaces, while carbide tips offer better grip on rock or ice. Baskets (small discs near the tip) prevent the poles from sinking too deeply into mud or snow.
Shelter and Sleep Systems: For Overnight Adventures
If your hiking plans extend beyond a day trip, you’ll need appropriate gear to keep you safe, dry, and warm overnight. This means having shelter that protects you from the elements and a sleeping system that ensures you get restorative rest. This is critical not just for comfort but for maintaining energy and preventing hypothermia.
Tents, Tarps, and Sleeping Bags
The specific choices here depend heavily on factors like weather, season, and personal preference.
- Shelter:
- Tents: Offer the most protection, fully enclosing you from wind, rain, and insects. They come in various sizes (1-person, 2-person, etc.) and weights. Ultralight backpacking tents are designed for minimal weight.
- Tarps: A minimalist option, a tarp provides rain and wind protection but usually requires more skill to set up effectively. They are very lightweight and packable but offer less bug protection unless combined with a separate bug net.
- Bivy Sacks: A waterproof or water-resistant shell that encases your sleeping bag. They offer protection from rain and wind but can be claustrophobic and may have condensation issues.
- Sleeping Bags:
- Temperature Rating: This is the most crucial spec. Ratings (e.g., 20°F, 30°F, 40°F or -7°C, -1°C, 4°C) indicate the lowest temperature at which the bag is designed to keep an average sleeper warm. Always choose a bag with a rating that’s a bit lower than the coldest temperature you expect.
- Insulation Type: Down insulation is very lightweight and compressible but loses insulating power when wet. Synthetic insulation is often more affordable, insulates when damp, and dries faster, but is heavier and bulkier.
- Shape: Mummy bags are more form-fitting and warmer, while rectangular bags offer more freedom of movement.
Sleeping Pad Considerations
Don’t forget a sleeping pad! It provides insulation from the cold ground and cushioning for comfort. Sleeping pads are rated by their R-value, which indicates their thermal resistance. Higher R-values mean more insulation.
Both closed-cell foam and inflatable pads are common options. Your sleeping system works together as a unit to provide warmth and comfort.
Common Hiking Gear Mistakes to Avoid
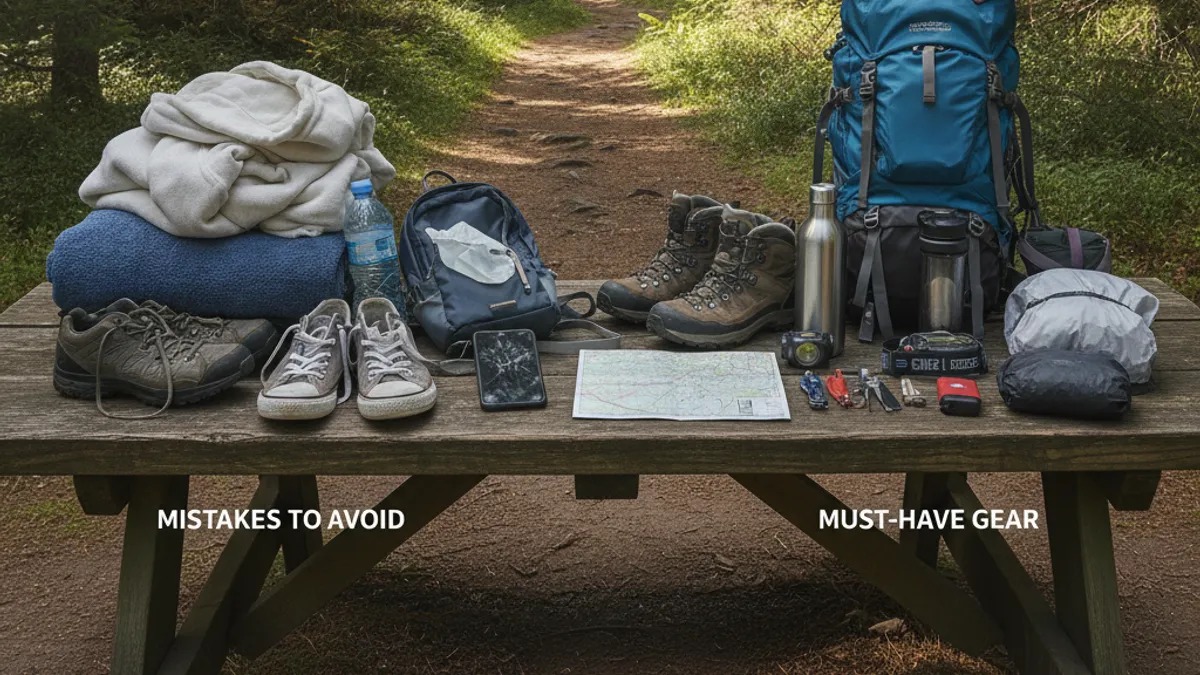
Even with the best intentions, hikers sometimes make mistakes with their gear that can lead to discomfort or safety issues. Being aware of these common pitfalls can help you scout them out and ensure your trip goes smoothly. Our analysis of user forums and safety reports highlights a few recurring issues.
- Ill-fitting Footwear: This is perhaps the most common and damaging mistake. Wearing boots that are too tight, too loose, or lacking proper support leads directly to blisters, bruised toenails, and foot pain. This can cut a hike short or make the remaining miles miserable. Always prioritize fit over brand or aesthetics.
- Overpacking: The “Just in Case” Trap: While preparedness is good, bringing too much weight in unnecessary items is a recipe for exhaustion. Every extra pound feels heavier with every step. Try to pack only what you truly need for the conditions and duration of your hike. Consider consulting hiking meal prep ideas to pack efficiently.
- Underpacking or Forgetting Essentials: On the flip side, forgetting critical items like extra water, a first-aid kit, or a reliable navigation tool can be dangerous. Always double-check your beginner hiking checklist before heading out.
- Poor Layering for Weather: Wearing a single, heavy layer in variable weather is a mistake. You’ll overheat on climbs and freeze on breaks. Effective layering, as discussed earlier, is key to comfort and safety.
- Not Testing New Gear: It’s tempting to use brand-new boots or a new backpack on a big hike. However, untested gear can be a gamble. Break in new boots on shorter walks and plan a shakedown hike with any new major gear to identify potential issues.
Gear for Different Hiking Scenarios
The “must-have” gear list isn’t one-size-fits-all; it adapts to the type and length of your hike. What you need for a quick afternoon stroll is quite different from what’s required for a multi-day backpacking trip in the wilderness.
Day Hiking Essentials
Day hikes are typically shorter excursions where you don’t need to carry overnight gear. The focus is on comfort, safety, and immediate needs.
- Backpack: A daypack, usually 20-35 liters, is ideal.
- Footwear: Comfortable hiking shoes or mid-cut boots that are broken in.
- Hydration: At least 1-2 liters of water, or a hydration reservoir.
- Navigation: A map and compass, or a reliable GPS app on your phone with downloaded maps.
- Sun Protection: Sunscreen, hat, sunglasses.
- Layers: A lightweight, packable jacket for wind or unexpected rain.
- First-Aid: A compact first-aid kit, including blister treatment.
- Snacks: High-energy snacks like trail mix, energy bars, or fruit. Researching best energy bars for hiking or best hiking snacks for energy can be helpful for this.
- Light Source: A small headlamp or flashlight, just in case.
Overnight Backpacking Gear
When you’re planning to camp out, your gear needs expand considerably. Every item is chosen with weight and functionality in mind, as you’ll be carrying it all. This is where understanding hiking backpack essentials becomes critical.
- Backpack: A larger pack, typically 35-60 liters, to carry sleeping gear, food, and extra clothing.
- Shelter: A lightweight tent, tarp, or bivy sack.
- Sleeping System: A sleeping bag rated for the expected temperatures and a sleeping pad for insulation and comfort.
- Cooking Gear (Optional): A lightweight stove, fuel, pot, and utensils if you plan on cooking hot meals. Otherwise, focus on no-cook meals. Refer to best food to bring on a long hike for meal planning.
- Increased Hydration: More water capacity or a reliable water filter/purifier if sources are available.
- More Clothing: Extra layers for warmth at night and in changing conditions, including extra socks. Consider best hiking gloves for cold weather if applicable.
- Larger First-Aid Kit: Potentially with more items for extended trips.
- Waste Management: A trowel for catholes and bags for packing out all trash.
Expert Tips for Gearing Up Wisely
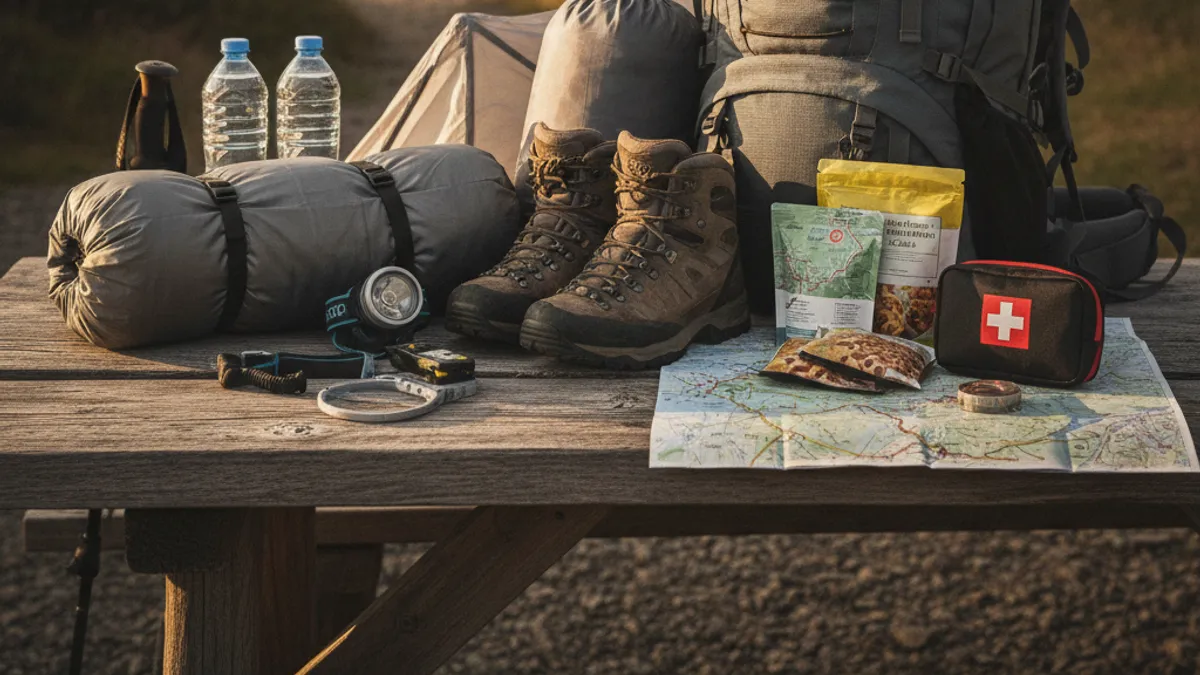
Beyond the basic checklist, a few expert insights can help you make smarter gear choices and get more value from your equipment. These tips are born from extensive field experience and analysis of outdoor practices. One overarching principle is to prioritize durability, functionality, and appropriate weight for your intended use.
- Invest in Key Items: While you don’t need the most expensive gear, investing in high-quality hiking boots and a well-fitting backpack can dramatically improve your comfort and safety. These are the items that bear the most direct impact on your experience.
- Understand Material Properties: Knowing the differences between materials like merino wool, polyester, down, and Gore-Tex helps you choose the right clothing for specific conditions. For example, merino wool excels at temperature regulation and odor resistance, while synthetic materials dry faster.
- Test and Maintain Your Gear: Before a critical trip, test your equipment. Set up your tent, fire up your stove, and wear your boots on shorter hikes. Regularly clean and maintain your gear according to manufacturer instructions to extend its lifespan and ensure reliable performance.
- Consider Versatility: Choose gear that can serve multiple purposes. A bandana, for instance, can be used for a pre-filter for water, to cool your head, or as a makeshift bandage.
- Don’t Be Afraid to Ask: Talk to experienced hikers, visit reputable outdoor gear shops, and read reviews, but always filter that information through your own planned activities and budget.
Frequently Asked Questions
How much water should I carry for a day hike?
For a general day hike, plan to carry at least 0.5 to 1 liter of water per hour of hiking. This can vary significantly based on temperature, humidity, elevation, exertion level, and your personal hydration needs. Always err on the side of carrying more water than you think you’ll need.
What’s the difference between a hiking shoe and a trail runner?
Hiking shoes are generally more robust, offering better protection and support for varied terrain. Trail runners are lighter and more flexible, mimicking athletic shoes, and are best suited for fast-paced hiking on less technical trails. Some hikers even use specialized hiking sandals review for certain conditions.
Do I really need trekking poles?
Trekking poles aren’t mandatory for all hikers but offer significant advantages in reducing joint strain, improving balance, and aiding propulsion on ascents. If you have knee issues, are hiking on steep or rough terrain, or carry a heavier pack, they can be a valuable addition to your gear list. Many beginners find them helpful for building confidence on the trail.

1 thought on “Guide to Must Have Gear for Hiking (2026) — Tried & Tested”