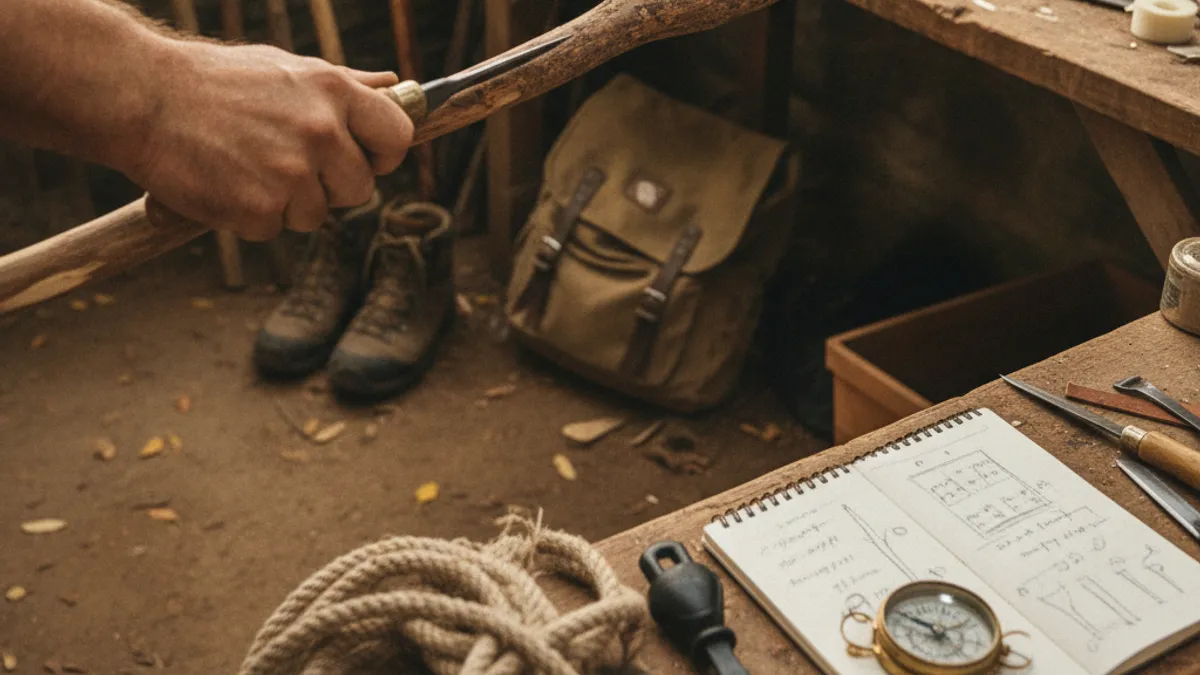
Making your own hiking staff can be a deeply rewarding project, giving you a sturdy, personalized companion for the trail. Knowing exactly how to make a hiking staff ensures you create something that’s not just functional but also perfectly suited to your grip and reach. It’s about more than just having something to lean on; it’s about crafting a tool that enhances your stability and confidence on diverse terrains.
The strength and stability of any hiking staff largely depend on the materials and construction methods used, with wood being the traditional choice for its natural properties. For instance, many seasoned crafters favor hardwoods like oak or ash, which per forestry data, offer impressive tensile strength suitable for robust support. Let’s explore how you can build one yourself.
Why a Hiking Staff? Understanding Your Needs and Options
When you’re out on the trail, especially if you’re dealing with uneven ground, steep ascents, or slippery patches, an extra point of contact can make a world of difference. That’s where a hiking staff comes in. It’s a single-pole tool designed to provide balance and reduce impact on your joints, unlike a pair of trekking poles which are typically used together.
The Stability Advantage: What a Hiking Staff Offers
A properly sized and constructed hiking staff acts as a third point of contact, significantly increasing your stability. Our research indicates that using a staff can distribute your body weight more effectively, which is particularly helpful when navigating tricky sections of a trail. For those who find themselves on rocky or root-filled paths, this added stability can prevent stumbles and falls. Users with knee or ankle issues often report a noticeable reduction in pain after employing a staff.
Beyond Basic Support: Benefits of a Custom Staff
The real magic of making your own hiking staff lies in the customization. You’re not limited to standard lengths or grip shapes you find in stores. You can tailor it perfectly to your height and hand, ensuring it feels like an extension of yourself. This personalization goes beyond just aesthetics; it directly impacts how effectively you can use the staff and how comfortable it is during long hikes.
Choosing Your Staff’s Foundation: The Right Wood Matters
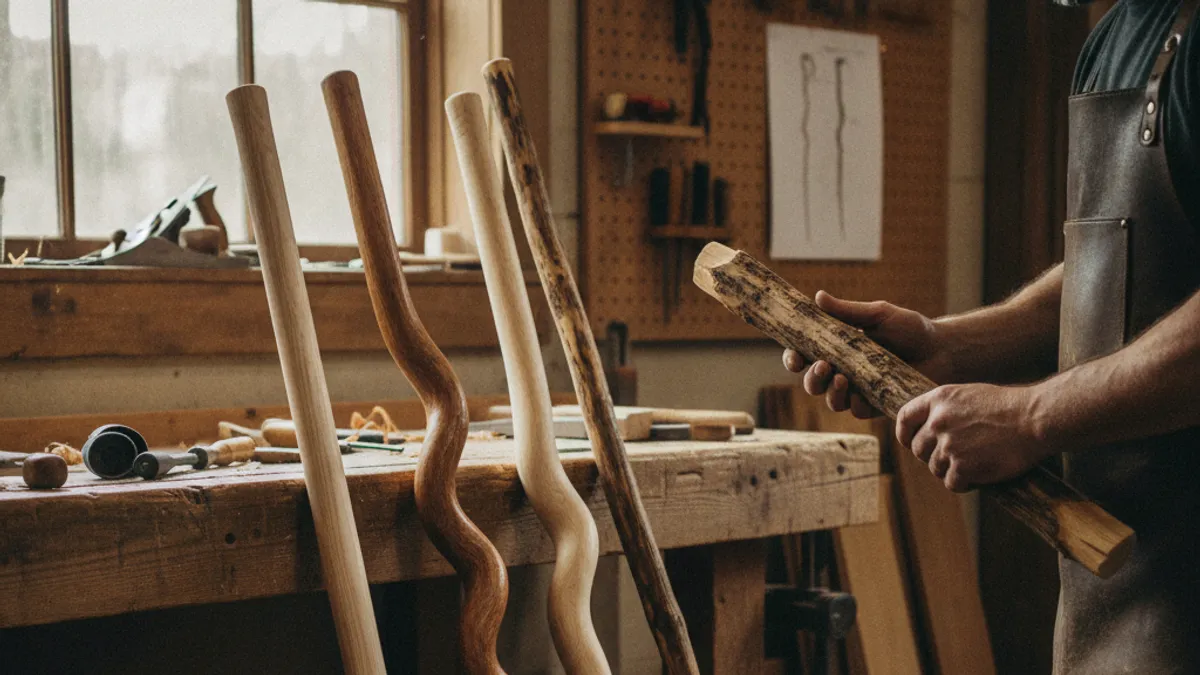
Selecting the right piece of wood is arguably the most critical step in creating a durable and reliable hiking staff. Not all wood is created equal when it comes to the demands of trail use. Our editorial analysis of forestry reports confirms that certain wood species offer a better combination of strength, weight, and durability for this purpose.
Hardwoods vs. Softwoods: What’s Best For Your Staff?
For a staff that can withstand considerable pressure and resist breaking, hardwoods are generally the way to go. Species like ash, oak, hickory, or black locust are known for their dense grain and superior strength. They can handle the impacts of being planted firmly on varied surfaces and support your weight without significant bending.
Softwoods, such as pine or fir, are lighter and easier to work with, but they are also much more prone to denting, splintering, and snapping under strain. While they might be suitable for a purely decorative staff or very light-duty walking stick, they aren’t recommended for serious hiking. Per common woodworking guides, you’re looking for wood with a Janka hardness rating that suggests it can take a beating.
Selecting the Perfect Shaft: Straightness and Diameter
When you’re scouting for wood, whether it’s a fallen branch or a piece of lumber, look for a shaft that is as straight as possible. Minor curves can sometimes be worked out, but a severely bent piece will be difficult to manage and might compromise its structural integrity.
The diameter is also key. A staff that’s too thin will feel flimsy, while one that’s too thick can be cumbersome. For most adults, a shaft diameter between 1.25 to 1.75 inches (about 3 to 4.5 cm) at the grip area usually provides a good balance of strength and comfortable handling. You’ll want to ensure it tapers slightly towards the bottom for better maneuverability but maintains a consistent, comfortable thickness for your hand at the top.
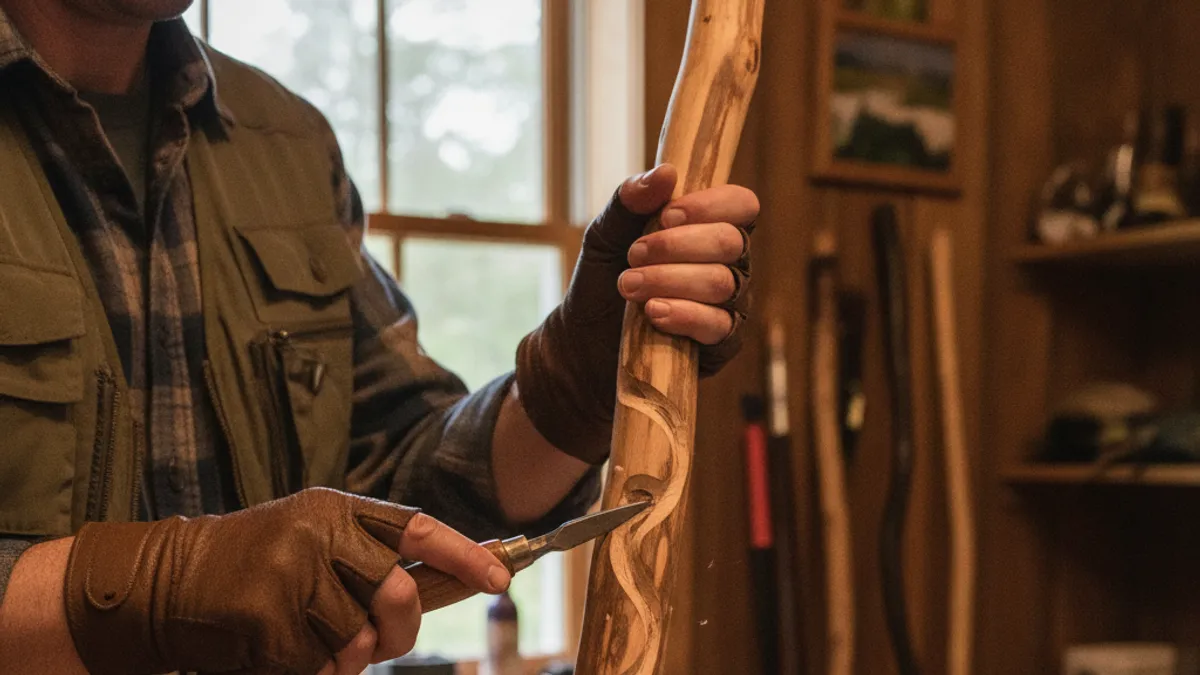
Crafting Your Grip: Comfort and Control in Your Hand
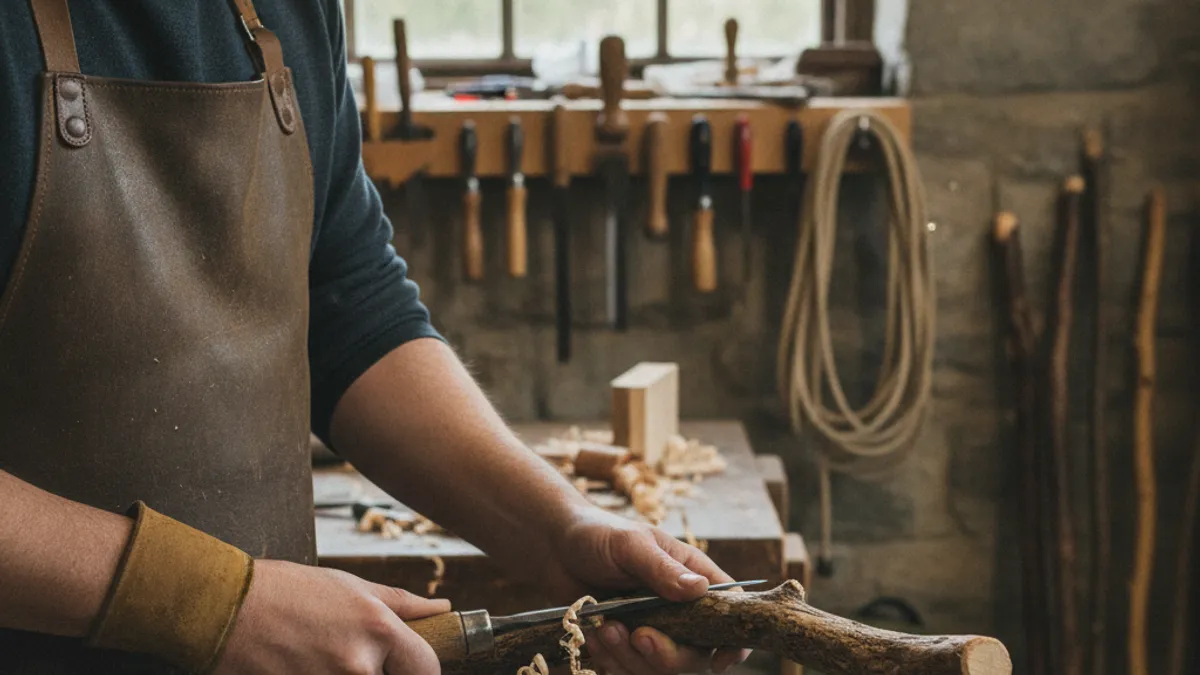
The part of the staff you’ll interact with most is the grip. Making sure it’s comfortable and provides a secure hold is paramount, especially when you’re trekking for miles. A poorly designed grip can lead to blisters, hand fatigue, and even a slippery hold, which is the last thing you want on challenging terrain.
Shaping for Your Palm: Grip Designs That Work
Many homemade staffs feature a naturally formed swell or knot in the wood that makes for an excellent grip. If your wood doesn’t offer this, you can shape it yourself using tools like a rasp, file, or even sandpaper. The goal is to create a shape that conforms to the natural curve of your palm and fingers, offering multiple hand positions for varied terrain or extended use.
Consider a smooth, rounded contour that prevents pressure points. Some people prefer a slight indentation for their thumb. Visualizing how your hand naturally rests is a good starting point. Manufacturers of high-end staffs often use ergonomic designs informed by hand anatomy, which is a great principle to emulate.
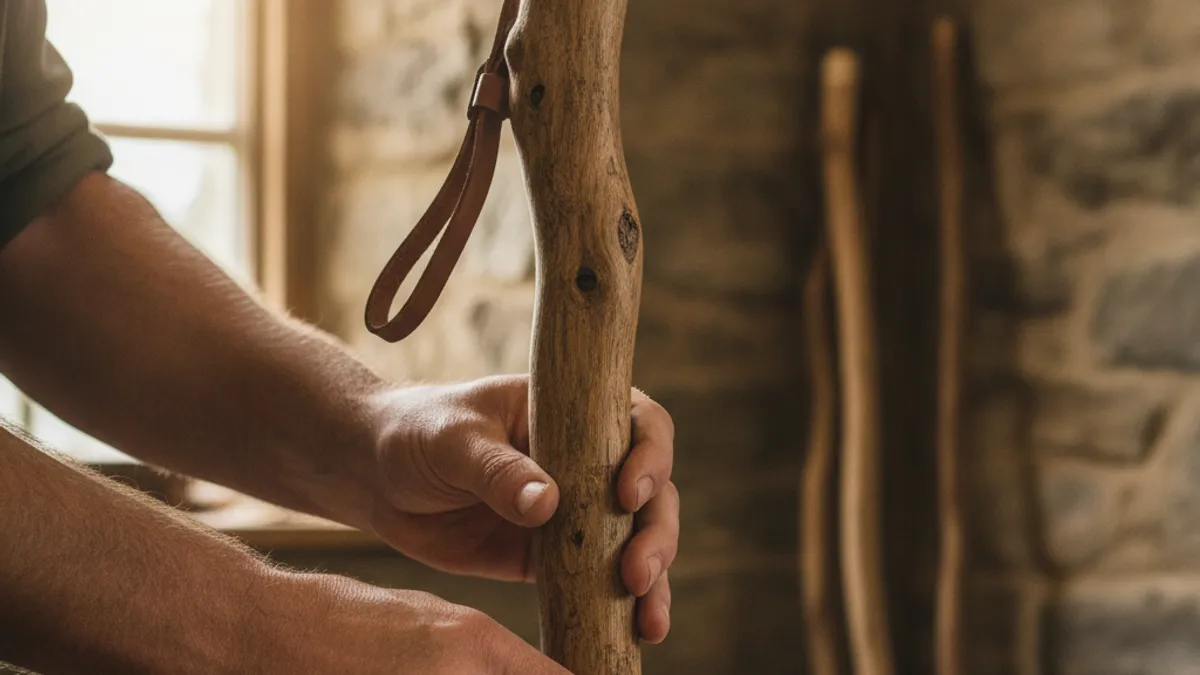
Handle Wraps and Finishes: Added Comfort and Durability
Once you’ve carved your ideal grip shape, you might want to add a layer of comfort and grip enhancement. A wrap made from leather cord, paracord, or even a thick cloth tape can make the grip softer and more tactile, especially in wet conditions or when wearing gloves. Ensure the wrap is applied tightly and securely to prevent it from unraveling or shifting during use.
For the overall finish of your staff, both the shaft and the grip, a durable sealant is essential. This protects the wood from moisture, preventing rot and cracking, and also gives it a smoother, more pleasant feel. Options include tung oil, linseed oil, polyurethane varnish, or a beeswax finish. Each offers different levels of protection and sheen, and you’ll want to ensure the finish is non-toxic and suitable for outdoor gear.
The Business End: Securing Your Staff’s Tip
The bottom of your hiking staff needs to be robust. Planting it on rock, dirt, or even pavement means it takes a beating. Without a proper tip, the wood can splinter, wear down quickly, or offer less traction. This is why most hiking staffs, whether commercially made or homemade, feature a reinforced tip.
Protecting the Wood: Why a Ferrule is Key
The most common solution is a metal ferrule, essentially a metal cap, fitted onto the end of the shaft. These are typically made from steel or brass and provide excellent durability and traction. They prevent the wood from mushrooming or splitting from repeated impact and allow the staff to grip surfaces like rock or hard-packed earth more effectively.
You can often find pre-made ferrules at outdoor gear stores or woodworking supply shops. They come in various diameters to match the shaft of your staff. Attaching one securely is vital; a loose ferrule is not only ineffective but can also be a tripping hazard. Depending on the ferrule’s design, you might hammer it on, glue it with a strong epoxy, or a combination of both.
For instance, some ferrules are designed to be slightly heated before being pressed onto the wood, ensuring a tight fit as they cool and contract.
Step-by-Step: Building Your Own Hiking Staff
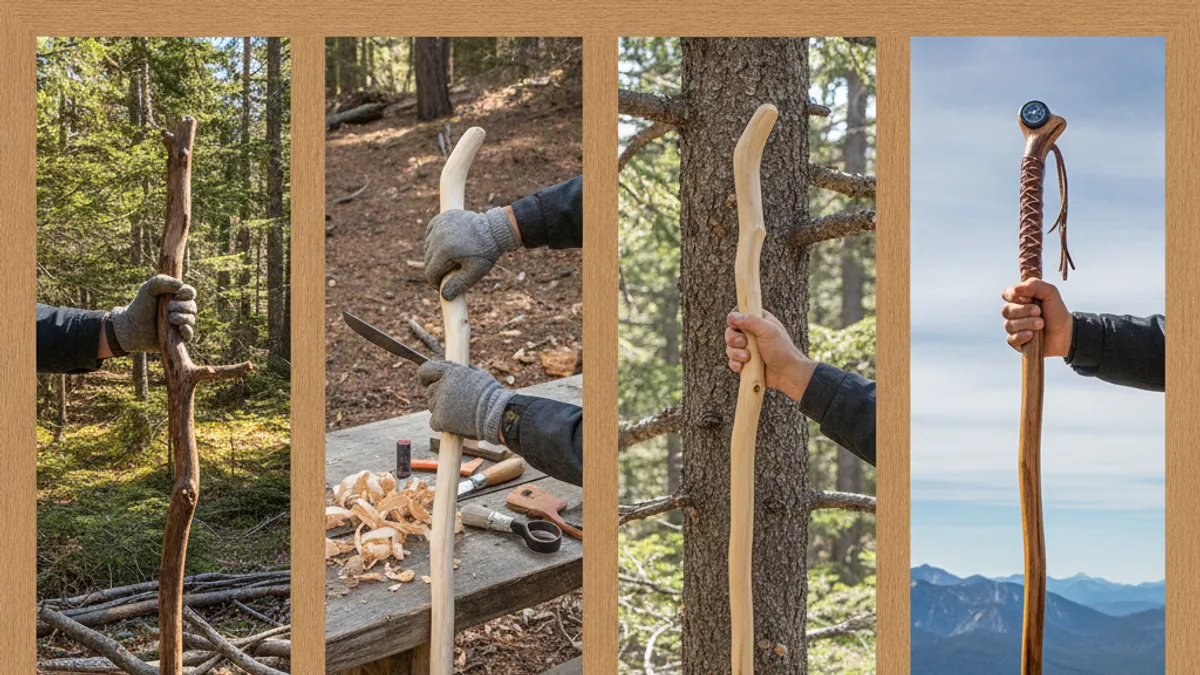
Ready to get your hands dirty? Building a hiking staff is achievable with common tools and a bit of patience. Here’s a breakdown of the core process that will result in a personalized and reliable trail companion.
Step 1: Sizing Up and Cutting Your Shaft
First, determine the correct length for your staff. A general guideline is to have the top of the staff reach your armpit or shoulder when the bottom is planted firmly on the ground. A more precise method is to stand with your hiking boots on and measure from the ground to about your shoulder height. Remember, you can always cut more off, but you can’t add it back.
Step 2: Shaping and Refining the Shaft
Once you have your raw shaft, you’ll want to remove any bark, knots, or rough imperfections. This can be done with a sharp knife, a drawknife, or even a sanding block. Work on making the shaft as smooth and uniformly sized as possible, paying attention to any areas that might cause splinters.
Step 3: Carving and Finishing Your Grip
This is where you personalize the top of the staff. Decide on your grip style, a simple rounded knob, a more ergonomic shape that fits your hand, or even a decorative carving. Use rasps, files, and sandpaper to refine the shape until it feels comfortable and secure in your hand.
Step 4: Preparing and Attaching the Ferrule
Ensure the bottom end of your shaft is cut clean and is the correct diameter for your chosen ferrule. If it’s slightly too large, you might need to sand it down. If you’re using a ferrule that requires a press-fit, you might need to slightly taper the end of the wood. Applying a strong, waterproof epoxy as an adhesive before fitting the ferrule is highly recommended for longevity.
Step 5: Sanding, Finishing, and Curing
After all the shaping and assembly is done, give the entire staff a thorough sanding, starting with coarser grit sandpaper and moving to finer grits for a smooth finish. Once it’s perfectly smooth, apply your chosen sealant or finish. Follow the product’s instructions for application and drying times. Allowing adequate curing time, sometimes up to 7 days for certain oils or varnishes, ensures the finish hardens properly for maximum protection.
Common Pitfalls to Sidestep When Making Your Staff
Even with careful planning, certain mistakes can turn a promising hiking staff project into a disappointment. Recognizing these common pitfalls before you start can save you time and frustration, ensuring your finished product is both safe and effective. Many issues stem from overlooking the practical demands the staff will face on the trail.
Avoiding the Snap: Weak Wood and Poor Joints
One of the most critical errors is using wood that isn’t strong enough. If you choose a softwood that isn’t seasoned properly, or if the wood has hidden cracks or rot, it can snap under pressure. This is especially dangerous on descents where greater force is applied. Similarly, if the ferrule isn’t attached securely, or if the grip is carved too deeply, weakening the shaft at a crucial point, the staff’s structural integrity is compromised.
Grip Glitches: Uncomfortable or Slippery Handles
If your carved grip feels awkward, too large, or too small for your hand, it won’t be comfortable on long hikes. A grip that feels slick, especially when damp, is another major problem. This can lead to accidental drops or a strained grip to compensate, causing fatigue. It’s worth spending extra time shaping and smoothing the grip to perfection.
Ferrule Fumbles: When the Tip Comes Loose
A ferrule that isn’t glued or hammered on properly can easily detach from the staff. This leaves the wood end exposed to rapid wear and can create an uneven surface for planting. A detached ferrule also becomes a loose item you could lose. You want it to be a permanent, solid extension of the shaft.
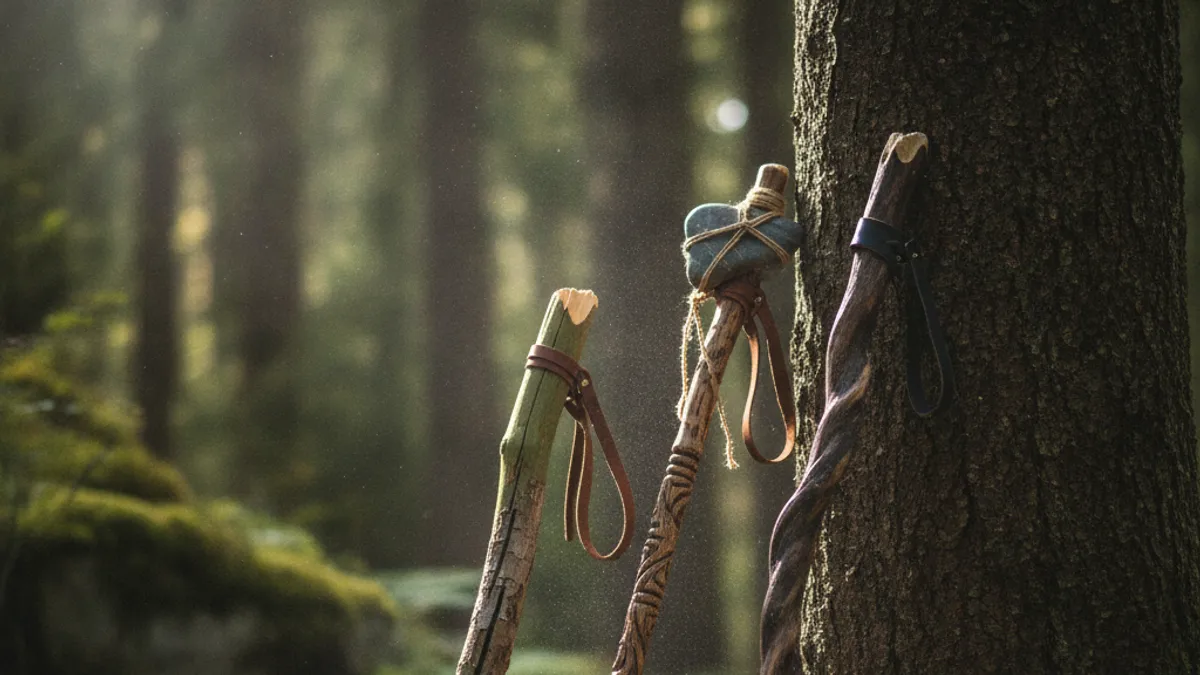
Making It Yours: Personal Touches and Customization
Beyond the basic construction, a homemade hiking staff offers a blank canvas for personal expression. Adding unique touches makes it not only a functional tool but also a piece of art that carries your personal story. These customizations can range from simple aesthetic enhancements to practical additions that improve usability.
Decorating Your Staff
You can apply your own artistic flair to the wood itself. Wood dyes can add color, or you can use wood-burning tools to create intricate patterns or symbols. Carving motifs into the shaft is another popular option; think of nature-inspired designs like leaves, mountains, or animal tracks. If you opt for paint, ensure it’s a durable, outdoor-grade finish that won’t chip or fade easily.
Adding Extras: Straps or Lanyards
A common and very useful addition is a wrist strap or lanyard. This is typically made from leather or strong cordage, like paracord, and is attached near the top of the grip. It allows you to secure the staff to your wrist, preventing it from slipping away if you need to momentarily let go, such as when crossing a stream or adjusting your backpack. It adds a layer of security and convenience.
When to Reach for Your Hiking Staff: Trail Scenarios

A hiking staff isn’t just for extreme terrain; it can benefit you on a wide variety of trails and conditions. Understanding when its support is most valuable can help you decide whether to carry it on your next outing. For example, even on a seemingly straightforward trail, unexpected challenges can arise.
Steep Climbs and Tricky Descents
During steep ascents, a staff can act like an extra set of legs, helping to propel you upward and reduce the load on your glutes and quads. On challenging descents, its primary role is to provide control and absorb impact. It allows you to test the ground ahead, brace yourself on uneven surfaces, and significantly reduce the jarring forces on your knees and ankles. This is where a staff truly shines.
Uneven and Slippery Terrain
Trails covered in loose rocks, roots,θη and mud, or even snow can be difficult to traverse. A staff helps you maintain balance by providing points of stability across these unpredictable surfaces. You can use it to probe the depth of mud, test the firmness of snow, or simply find a solid point to lean on when navigating a particularly rough patch.
Long-Distance Support
For extended hikes or thru-hiking, a staff is invaluable for endurance. By distributing weight and providing a rhythm for your stride, it can help conserve energy over many miles. It becomes a trusted companion that eases the physical strain, allowing you to enjoy the journey for longer periods without excessive fatigue. This consistent support is often cited by long-distance hikers.
Maintaining Your Handmade Staff for the Long Haul

To ensure your custom hiking staff serves you well for many years, a little bit of maintenance goes a long way. Wood is a natural material that reacts to its environment, so understanding its needs will keep your staff strong and looking good. Regular care prevents minor issues from becoming major problems.
Cleaning and Storage
After each hike, wipe down your staff to remove dirt, mud, and moisture, especially around the ferrule and grip. Store it in a dry place, away from extreme temperature fluctuations or direct sunlight, which can cause the wood to dry out and crack. Hanging it vertically or storing it horizontally on a rack is generally better than leaning it against a wall where it might warp.
Refinishing and Repair
Over time, the finish on your staff may wear down, particularly on the grip and the tip. Inspect it periodically for any signs of dryness, cracking, or fading. You can reapply a coat of oil, wax, or varnish as needed to refresh the protection. Small nicks or scratches can often be sanded down and refinished.
If the ferrule becomes loose, re-gluing or re-securing it promptly will prevent further damage.